Tuesday, August 9, 2022

Get your Business Listed Online for FREE!


Want more people to be able to find your business online?
Use this list of websites to get your business listed for FREE!

By listing your company on the various websites listed below, you will help potential customers find you no matter the service or platform they are using! Additionally, having your company information and website information listed around the internet also makes your website look "more important" to search engine crawlers! Which in turn, could improve your web search rankings! Pacific Northwest Computers offers this as a service to our customers as well! So feel free to get in touch with Pacific Northwest Computers if you would like some help getting this all set up for you! 

Jon Pienkowski
Pacific Northwest Computers
360.624.7379

Monday, May 30, 2022

Windows Security Center Stops Working - Windows 11

I have run into a problem repeatedly recently. On a client computer running Windows 11, if I go to open the Windows Security Center, it won't open and I will get the following message/error:

Some websites will recommend the following:

"Go to the Settings. Select App > Apps & features and type in ‘security’ in search menu box. An icon for Windows Security will pop open. From there, click on the options (three dots) and select Advanced options. Now scroll down to Reset section and click on Reset.

You’ll get a confirmation asking if you really want to reset the app, along with your whole app data. Click on Reset to go with it."

However, so far what I have found is that "Windows Security" is not in the application list at all! 

So how can I reset the app?

Well, what I have found was a simple command you can run from the Windows PowerShell (with administrative privileges) that ultimately solved the problem for me, as well as for some of my clients who have run into this same issue as well.

  • Using Windows' search, just type in "PowerShell"


  • Right-click on its icon, and select "Run as Administrator"
  • Next, copy and paste (or type in) the following script:

Get-AppxPackage Microsoft.SecHealthUI -AllUsers | Reset-AppxPackage

  • Hit Enter, and you should get a screen like this:


That should do the trick!
Your Windows Security Center should now be working again!

Pacific NW Computers
www.pnwcomputers.com
360.624.7379

Thursday, April 28, 2022

M.2 SSD Not Detected by Windows 11/10 Installer

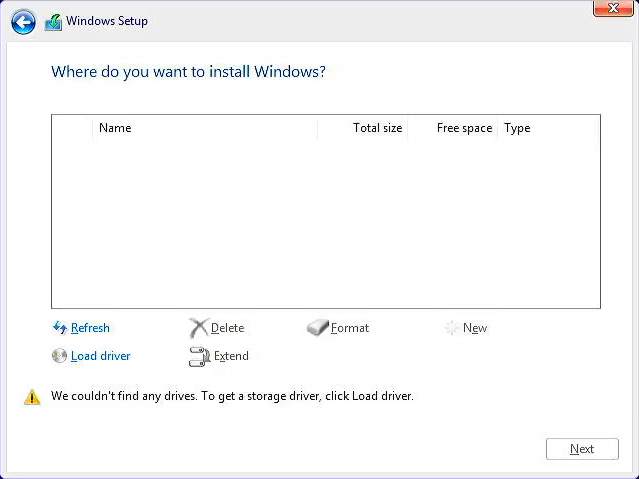
If you experience that the Windows installer cannot find your M.2/NVMe drives when installing Windows 11/10, try this process of loading the Intel IRST driver to gain access to your SSD drive!


For the Intel CPU platform, you need to manually install Intel Rapid Storage Technology (IRST) driver during the Windows installation process. You can also refer to the Intel document of How to Configure RAID or Intel Optane Memory with Intel RST on an Intel VMD Capable Platform.
Note: The following pictures are a reference, it may be varied depending on the different versions.


Manually install Intel Rapid Storage Technology (IRST) driver

  • Download Intel Rapid Storage Technology (IRST) driver Download Link.
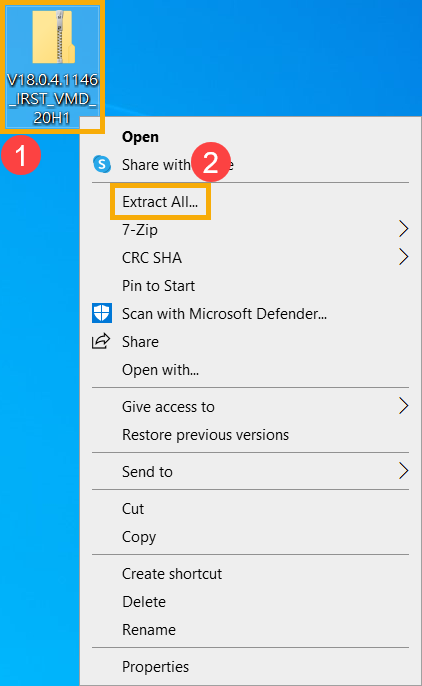
  • After downloading the driver, right-click [V18.0.4.1146_IRST_VMD_20H1] compressed file① and select [Extract All]②.
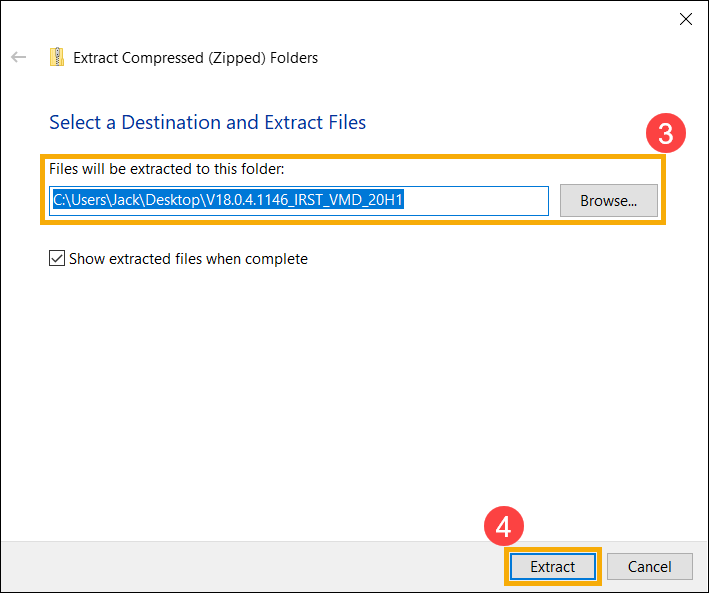
  • Select a Destination③ (such as a USB thumb drive) and click [Extract]④.

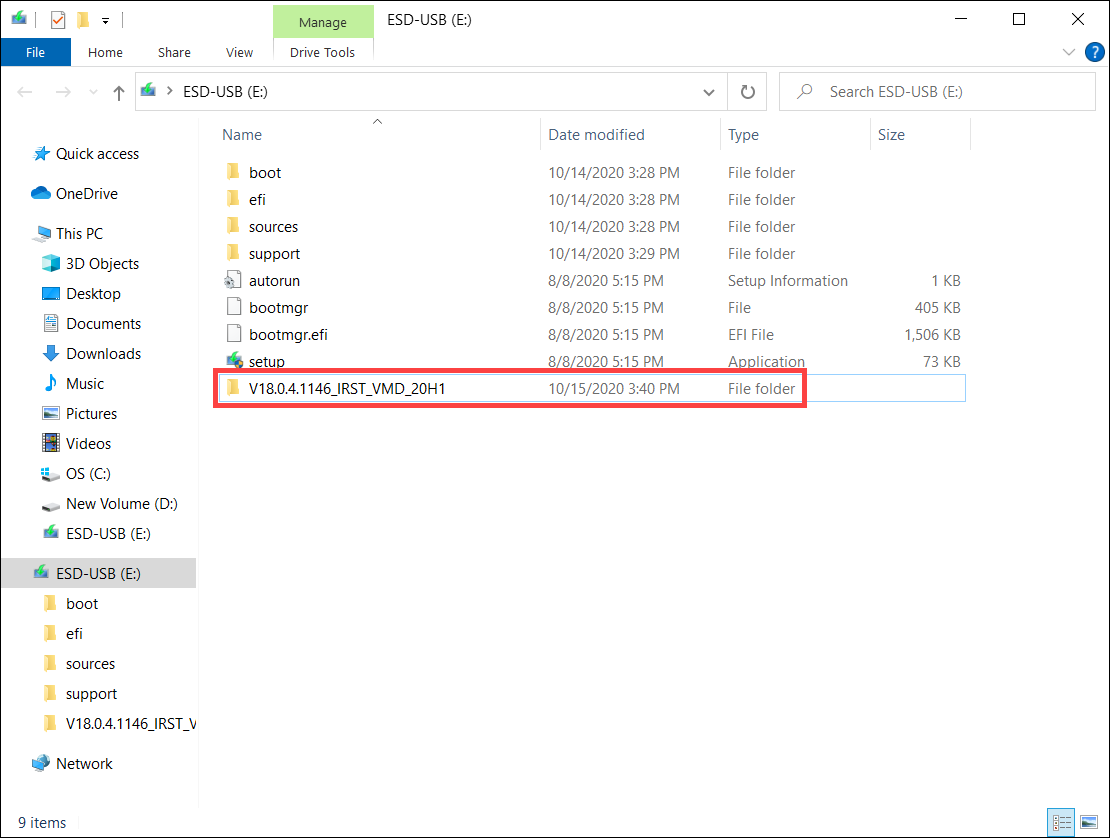
  • After the extraction is completed, please copy the entire folder (V18.0.4.1146_IRST_VMD_20H1) to a USB flash drive.
  • If you used a USB flash drive to create the Windows 11/10 installation media as well, please copy the entire folder to the same USB flash drive which is created as the Windows 11/10 installation media.

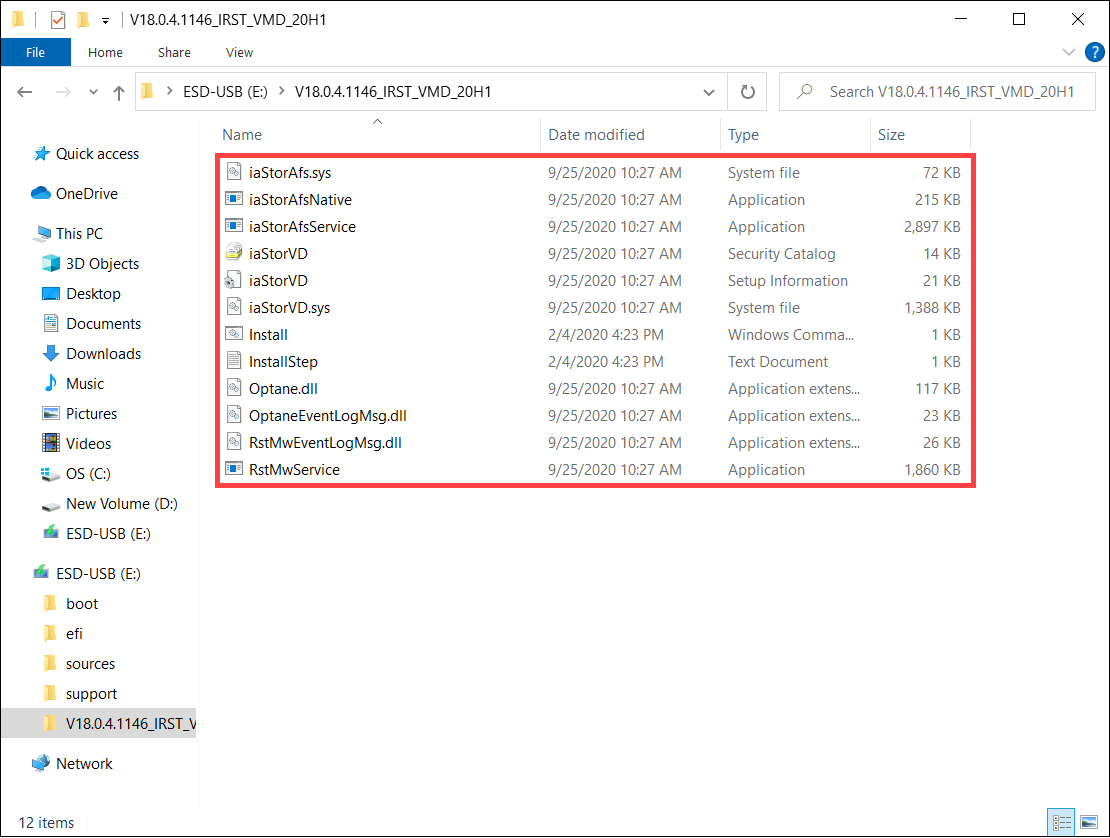
  • After the copying is completed, make sure the folder includes the following files.

Install Intel Rapid Storage Technology (IRST) driver

  • Connect the USB flash drive which includes the Windows 11/10 installation media and Intel Rapid Storage Technology (IRST) driver (V18.0.4.1146_IRST_VMD_20H1 folder) to the target computer. (If you used a DVD to install Windows 11/10, please insert the DVD and consist of the above files USB flash drive to the target computer together.)
  • Restart the Windows 11/10 installation process, here you can learn more about How to use installation media to insatll Windows 11/10.
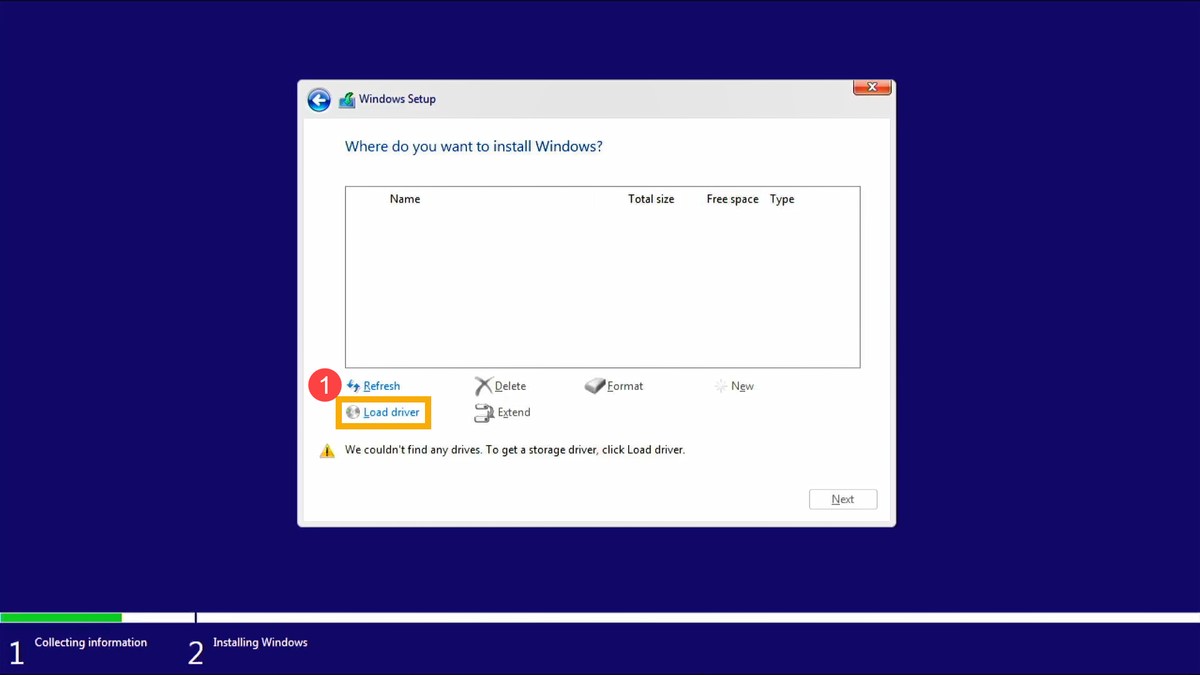
  • On the screen of Where do you want to install Windows and Windows cannot find any drives, please select [Load driver]①.

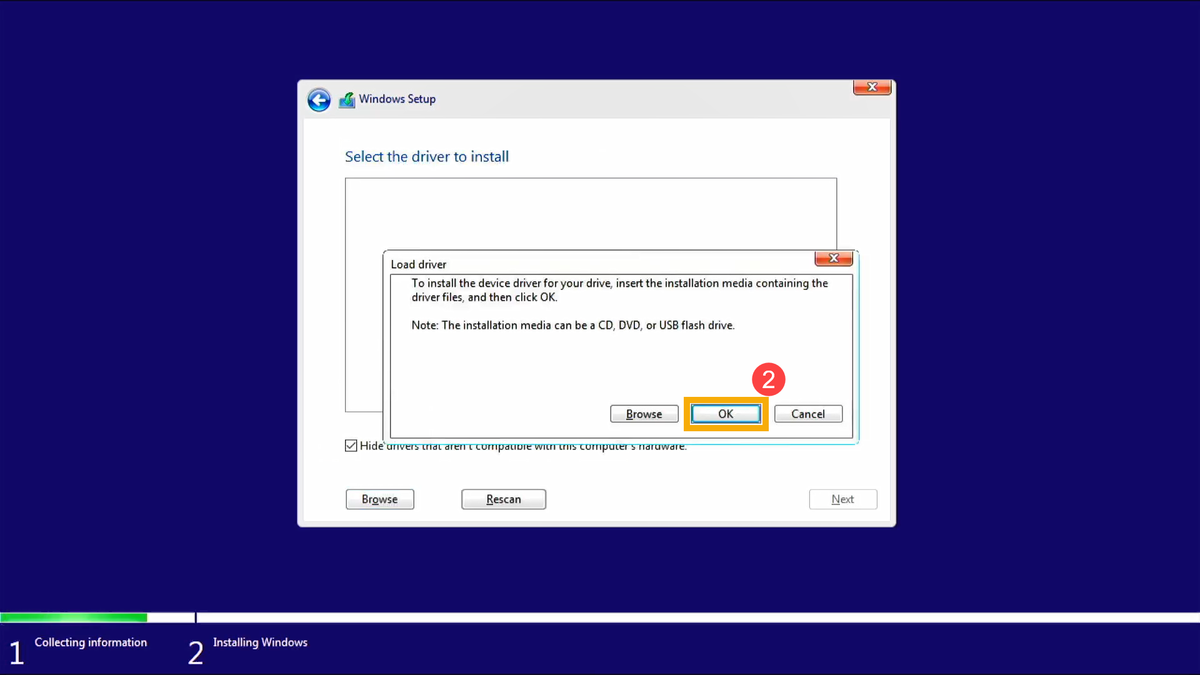
  • Select [OK]②.

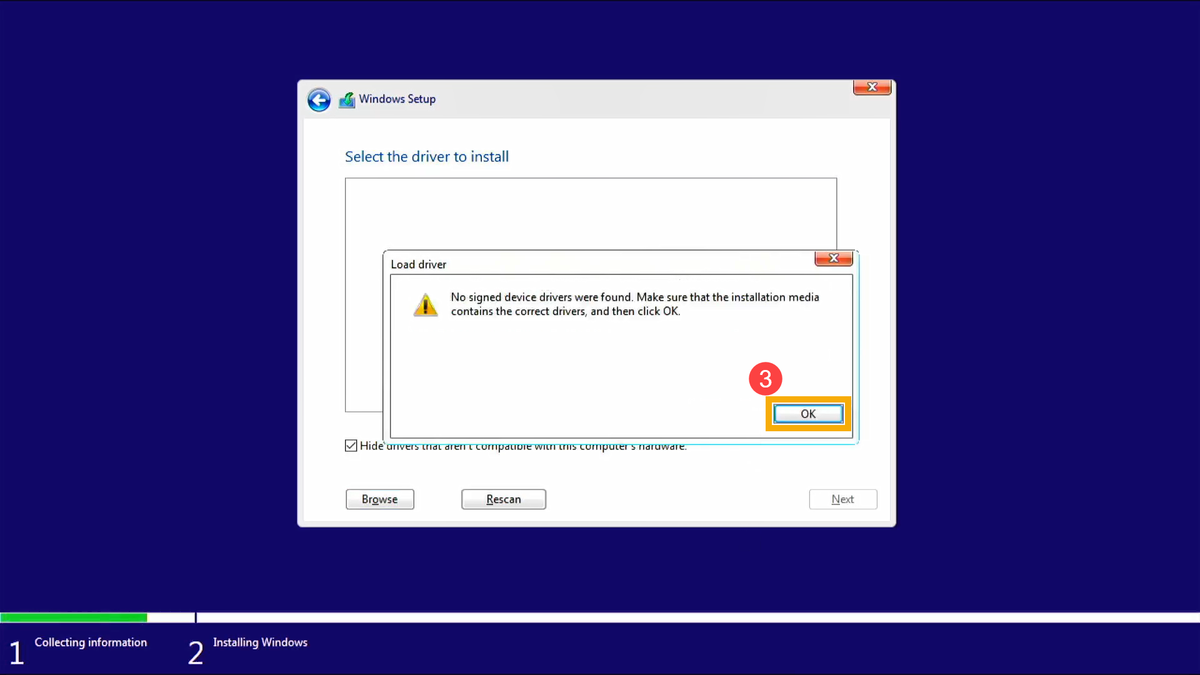
  • Click [OK]③.

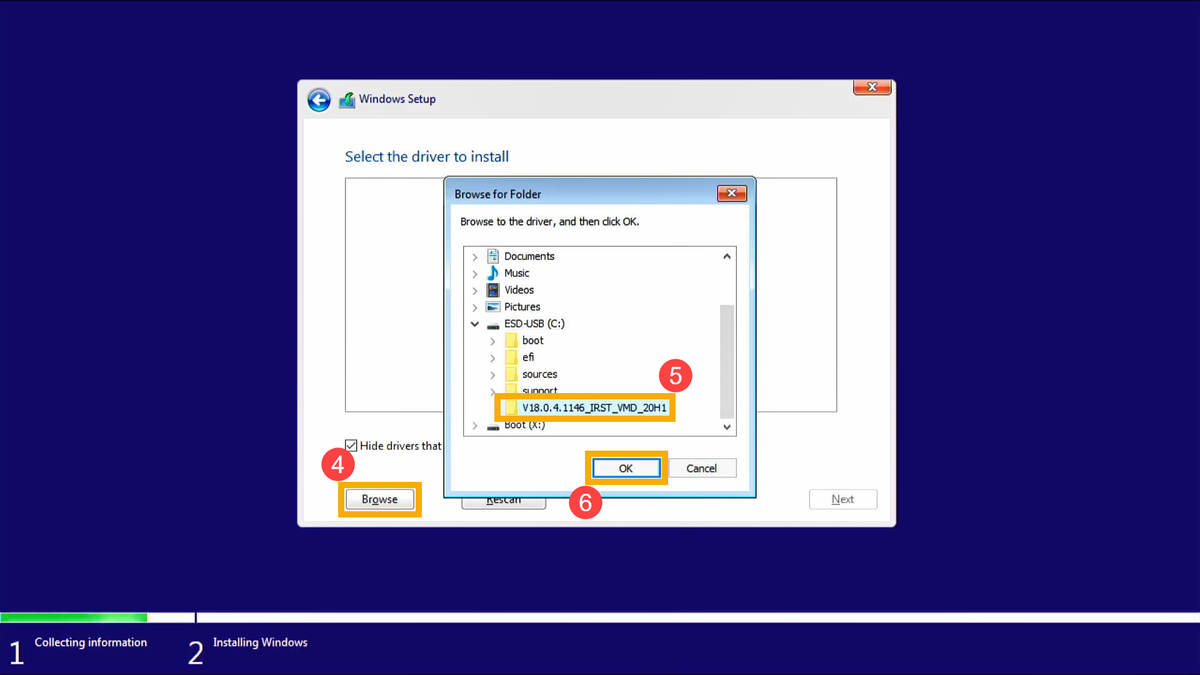
  • Select [Browse]④, then find the [V18.0.4.1146_IRST_VMD_20H1] folder⑤ and select [OK]⑥.

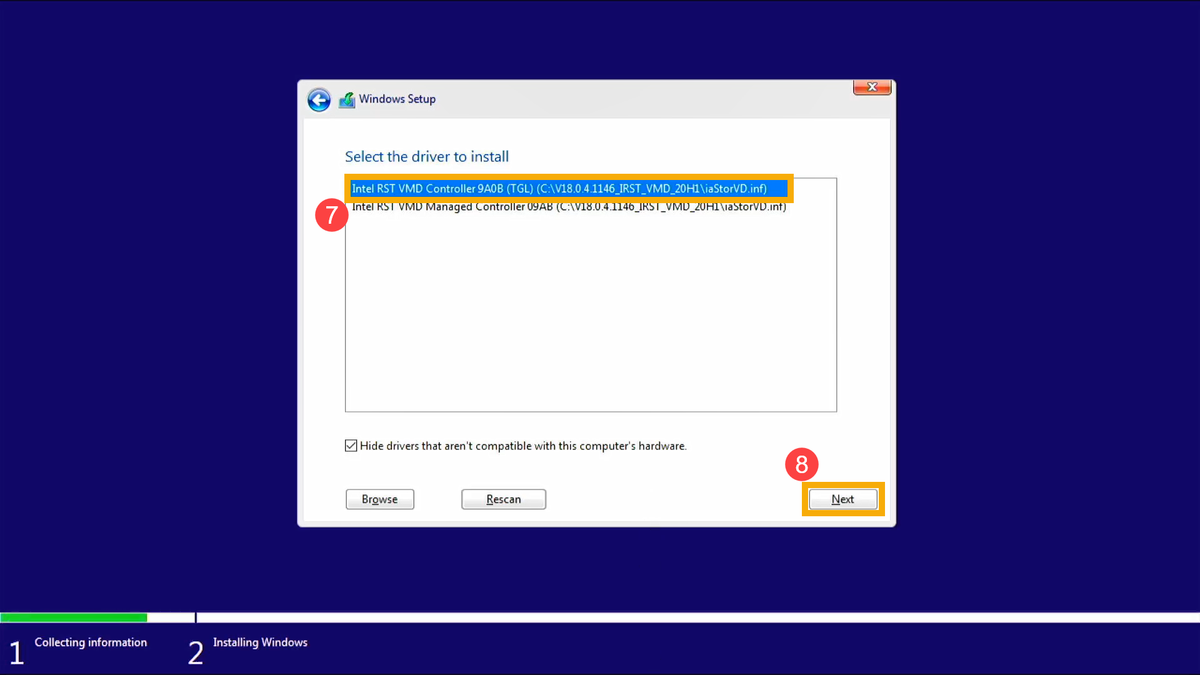
  • Select [Intel RST VMD Controller 9A08 (TGL) ]⑦, then select [Next]⑧ to install the driver.

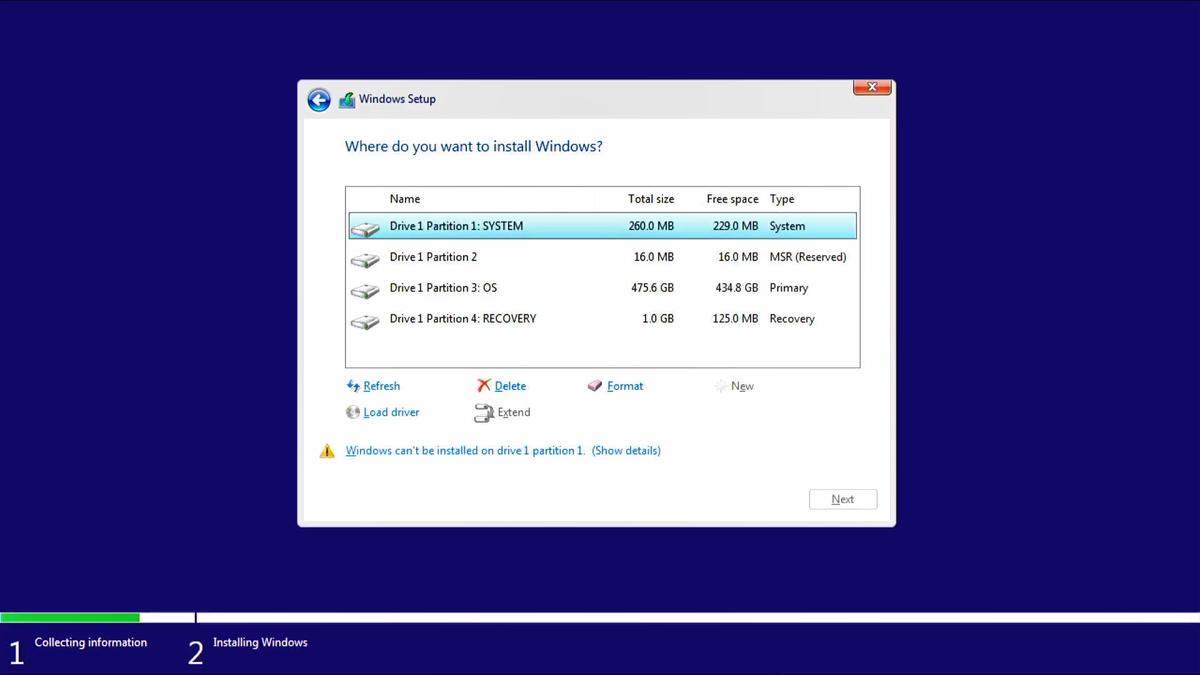
  • After the driver installation is completed, the drives will appear normally.

That's it!

The Windows installer should now see your M.2/NVMe drive!


Original Article:
https://www.asus.com/support/faq/1044458