Showing posts with label windows installation. Show all posts

Wednesday, March 27, 2024

Upgrade To Windows 11 ~ With Your Apps and Data Intact!

 Can You Install Windows 11,
Without Losing Apps or Data In The Process? 

Why yes you can! 

Thanks to the Windows Installation Assistant!


I found an article (linked below) while looking into a "surefire" way to upgrade a Windows 10 system to Windows 11, without having to run the risk of needing to reinstall software and applications, or even potentially loose data. Currently, the only guaranteed method to install Windows 11 on your computer without performing a fresh install is by using the Installation Assistant. This tool from Microsoft acts as an update, transforming your existing Windows installation to the newer version without affecting any of the files or applications:

 https://helpdeskgeek.com/windows-11/how-to-upgrade-to-windows-11-without-losing-any-data/


Jon Pienkowski
Pacific NorthWest Computers

Tuesday, March 5, 2024

Scan/Repair Corrupted Windows 10 & Windows 11 System Files

1) Open an elevated Command Prompt:

2) In the command prompt, enter the following commands one at a time. Let each procedure fully complete its process before moving on to the next command/repair.

  1. SFC /SCANNOW
  2. DISM /Online /Cleanup-Image /StartComponentCleanup
  3. DISM /Online /Cleanup-Image /RestoreHealth

3) Restart the system and verify repairs were completed successfully.

4) If issues persist after running these repairs, running a repair installation of the Windows Operating System (being sure to retain user data) would be the next step in hopes of repairing the system:

https://support.microsoft.com/en-us/windows/reinstall-windows-d8369486-3e33-7d9c-dccc-859e2b022fc7#bkmk_reset_windows_10

Jon Pienkowski
Pacific NW Computers

Thursday, April 28, 2022

M.2 SSD Not Detected by Windows 11/10 Installer

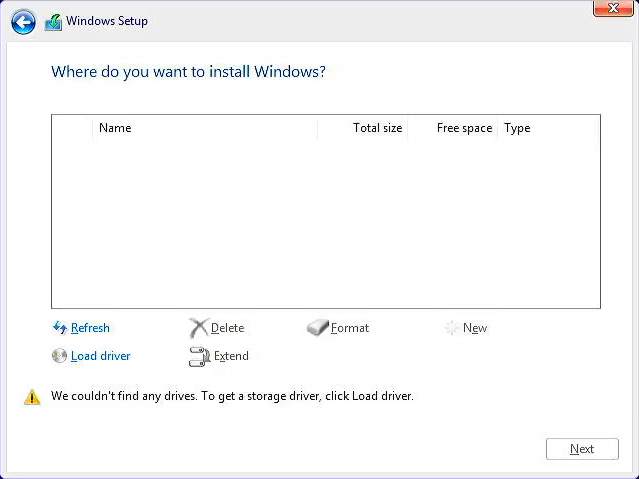
If you experience that the Windows installer cannot find your M.2/NVMe drives when installing Windows 11/10, try this process of loading the Intel IRST driver to gain access to your SSD drive!


For the Intel CPU platform, you need to manually install Intel Rapid Storage Technology (IRST) driver during the Windows installation process. You can also refer to the Intel document of How to Configure RAID or Intel Optane Memory with Intel RST on an Intel VMD Capable Platform.
Note: The following pictures are a reference, it may be varied depending on the different versions.


Manually install Intel Rapid Storage Technology (IRST) driver

  • Download Intel Rapid Storage Technology (IRST) driver Download Link.
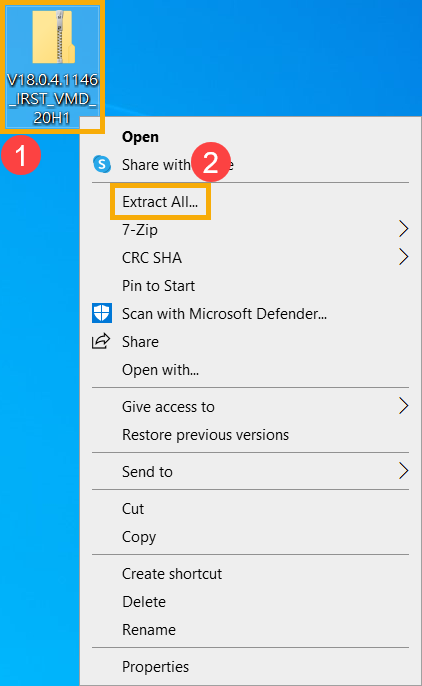
  • After downloading the driver, right-click [V18.0.4.1146_IRST_VMD_20H1] compressed file① and select [Extract All]②.
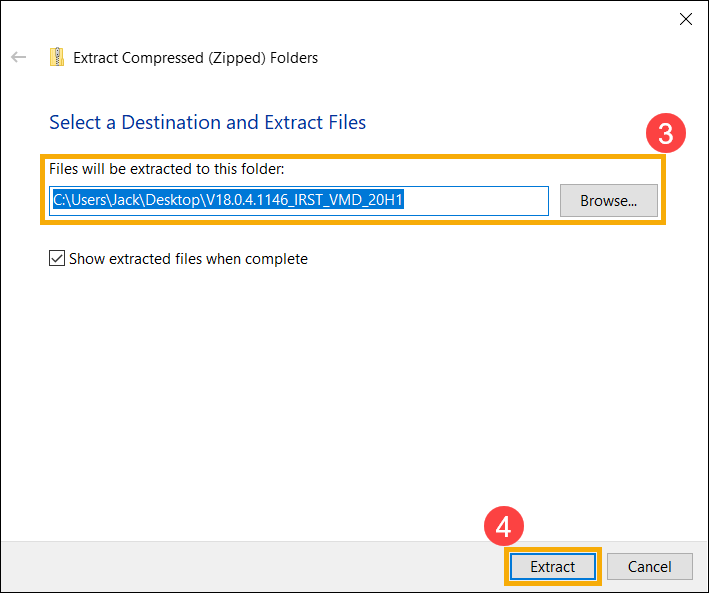
  • Select a Destination③ (such as a USB thumb drive) and click [Extract]④.

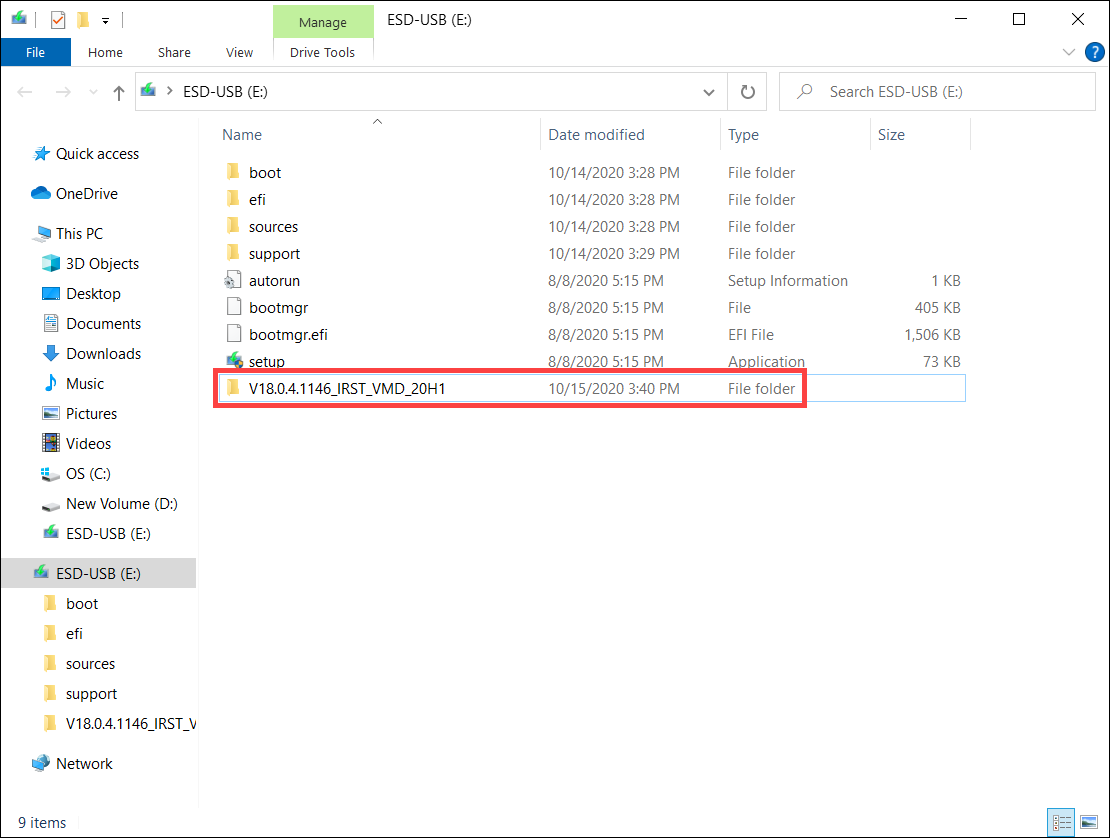
  • After the extraction is completed, please copy the entire folder (V18.0.4.1146_IRST_VMD_20H1) to a USB flash drive.
  • If you used a USB flash drive to create the Windows 11/10 installation media as well, please copy the entire folder to the same USB flash drive which is created as the Windows 11/10 installation media.

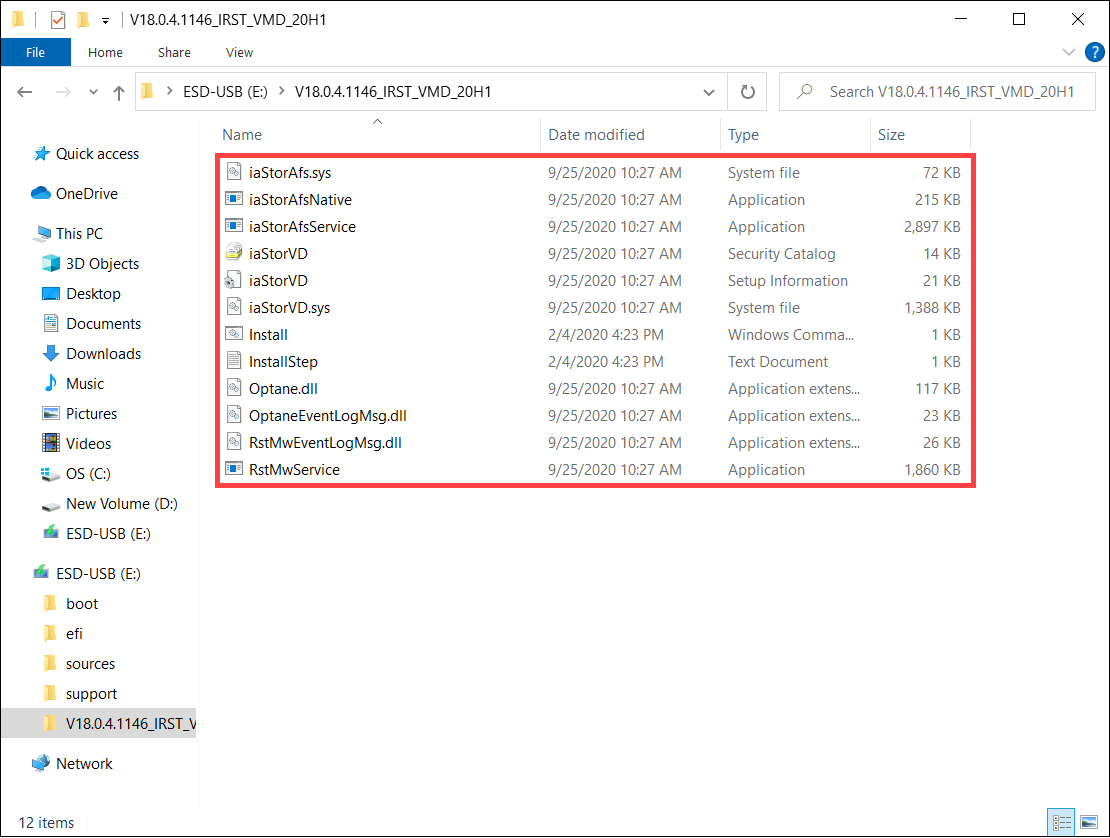
  • After the copying is completed, make sure the folder includes the following files.

Install Intel Rapid Storage Technology (IRST) driver

  • Connect the USB flash drive which includes the Windows 11/10 installation media and Intel Rapid Storage Technology (IRST) driver (V18.0.4.1146_IRST_VMD_20H1 folder) to the target computer. (If you used a DVD to install Windows 11/10, please insert the DVD and consist of the above files USB flash drive to the target computer together.)
  • Restart the Windows 11/10 installation process, here you can learn more about How to use installation media to insatll Windows 11/10.
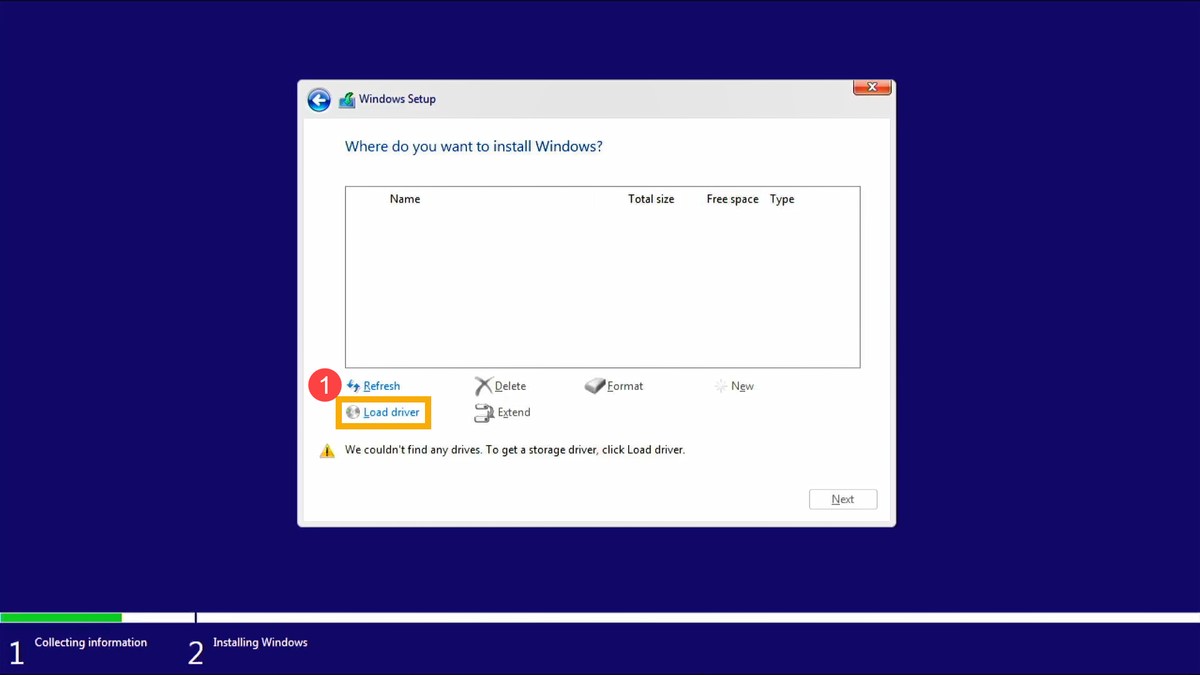
  • On the screen of Where do you want to install Windows and Windows cannot find any drives, please select [Load driver]①.

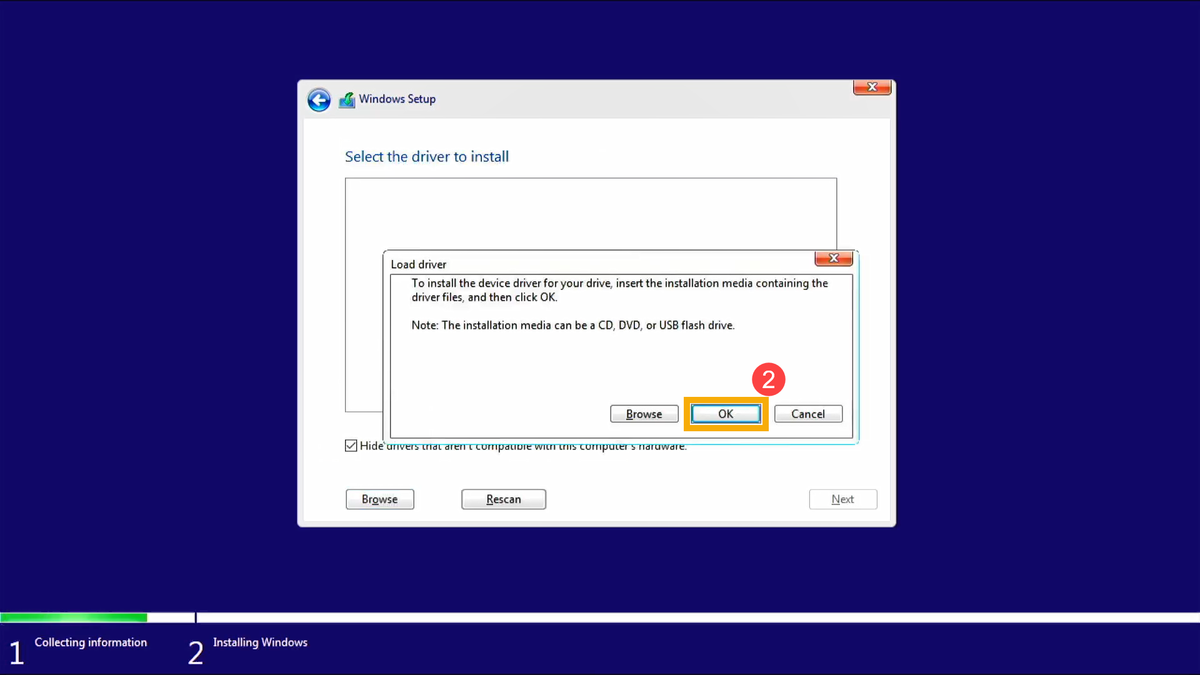
  • Select [OK]②.

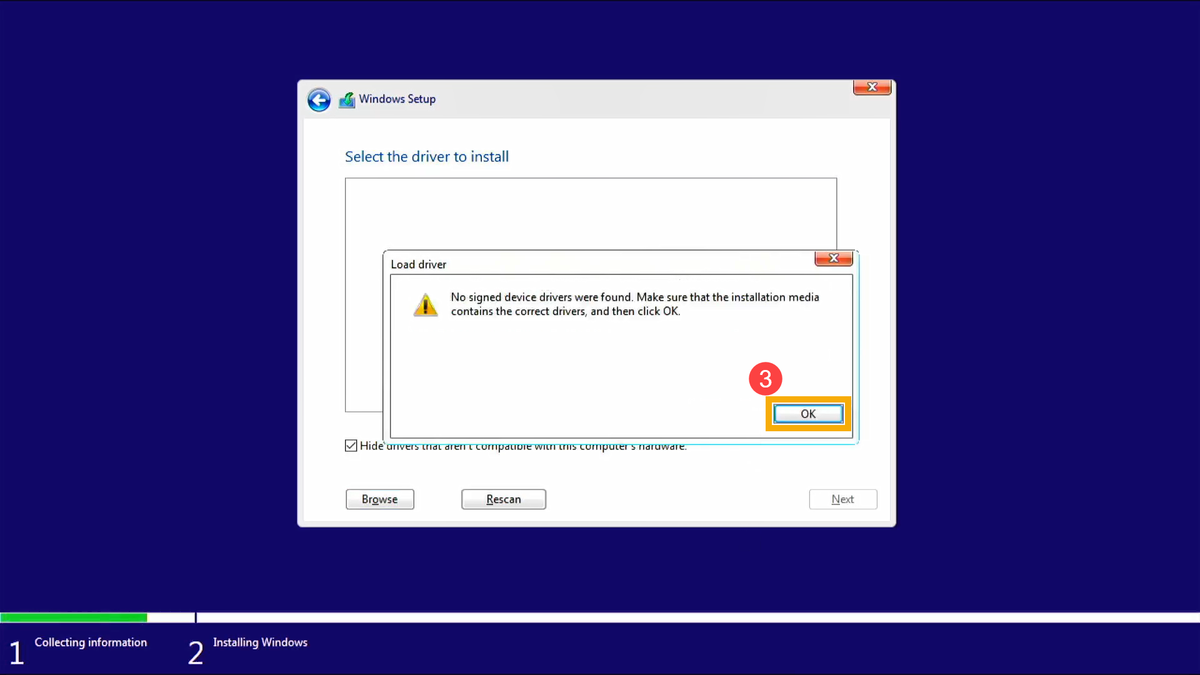
  • Click [OK]③.

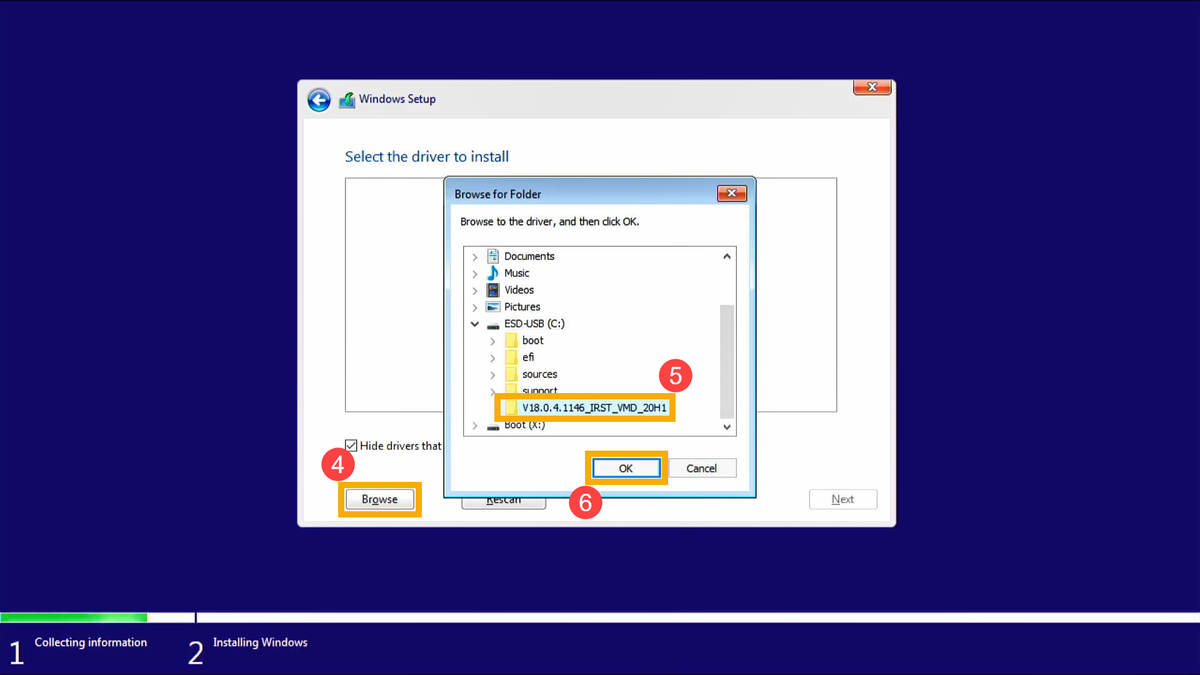
  • Select [Browse]④, then find the [V18.0.4.1146_IRST_VMD_20H1] folder⑤ and select [OK]⑥.

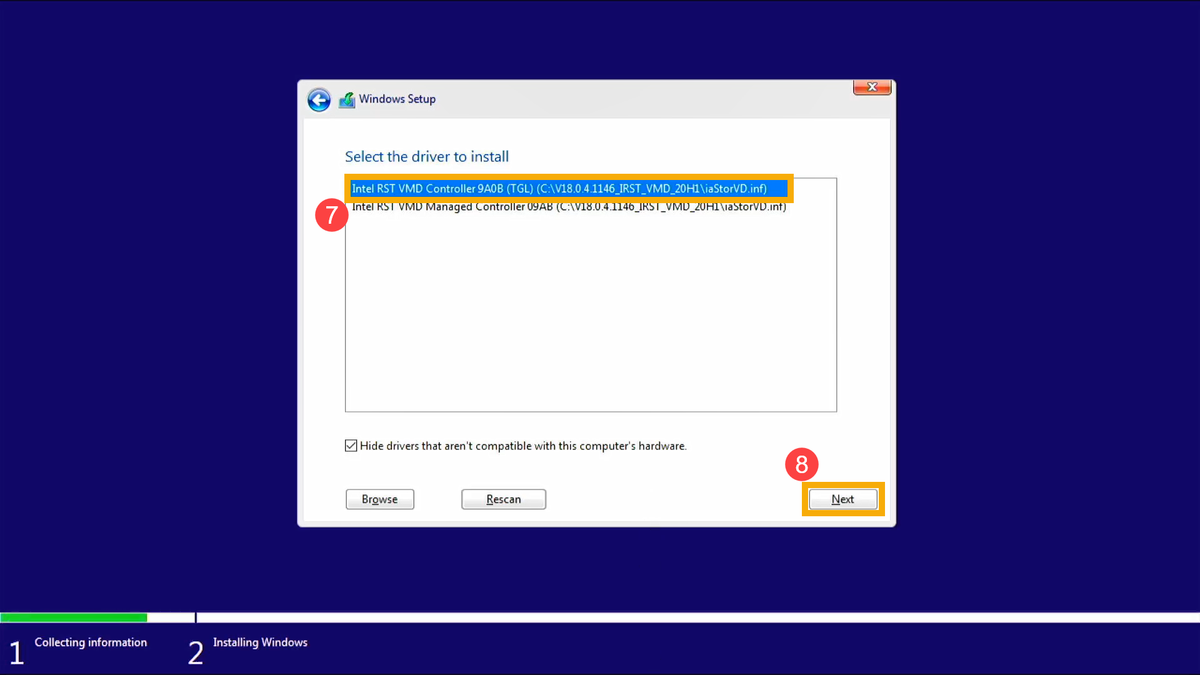
  • Select [Intel RST VMD Controller 9A08 (TGL) ]⑦, then select [Next]⑧ to install the driver.

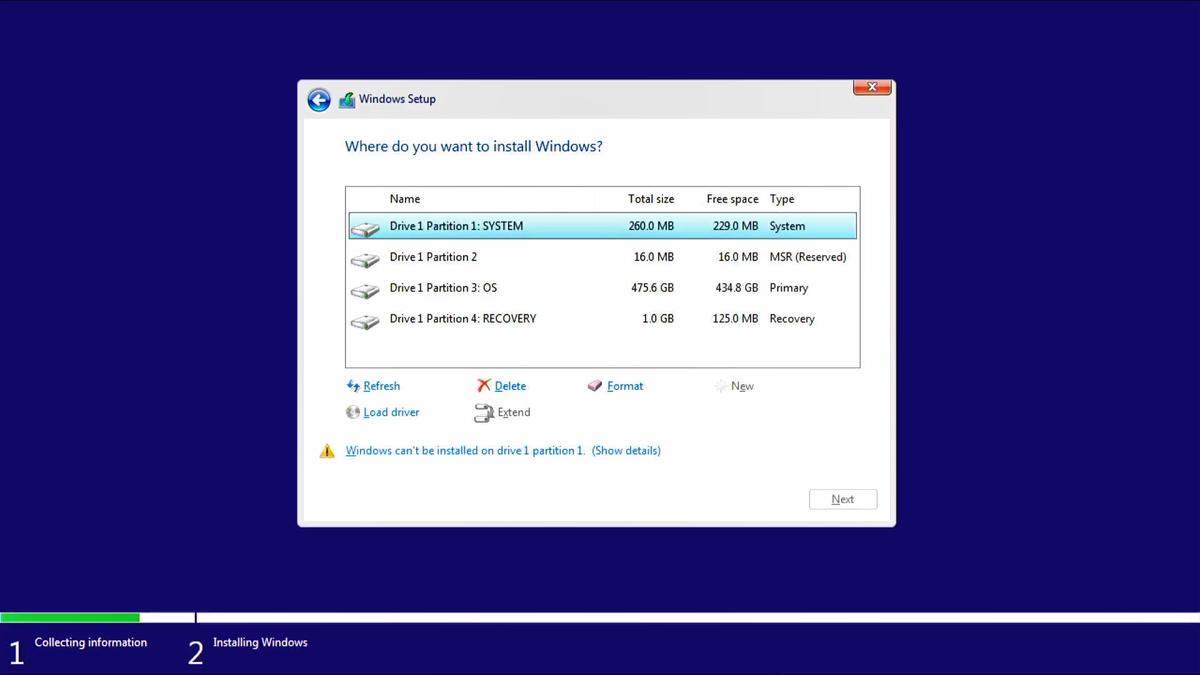
  • After the driver installation is completed, the drives will appear normally.

That's it!

The Windows installer should now see your M.2/NVMe drive!


Original Article:
https://www.asus.com/support/faq/1044458