With more than 20 years of experience, Pacific NorthWest Computers provides affordable on-site and in-shop computer repair services in Washington and Oregon State! We provide services ranging from onsite and remote support, malware removal, data recovery, laptop hardware repairs, custom-built computers, networking, security services, consulting/training, and many other computer/tech-related support and services! www.linktr.ee/pnwcomputers
Showing posts with label ssd. Show all posts
Monday, February 17, 2025
Monday, April 1, 2024
What Specs Do You Need In A New Computer!?
CPUs:
Both Intel and AMD employ a numbering system to classify their CPU models based on their respective performance.Tuesday, March 12, 2024
VHD & RMD IODD Drive Setup

IODD Encrypted External Drive;
VHD/RMD Creation
- Use the VHD_Tool+ that you can download from the IODD website:http://iodd.kr/wordpress
- Open and run the VHD Tool+, and click on the "Create" tab. That will switch the program to its VHD "Create" function, where you will be able to create a blank/empty VHD on your IODD drive that you will later apply/"burn" a disk image to.
- When you click on the folder icon to "browse for a VHD" you actually just need to type in the name of the VHD that you would like to create, and then continue like you are going to "open" that new VHD; even though it is not actually there. Trust me, it will work.
- Next, you want to make sure the VHD file that you are creating is larger than the ISO that you will be applying to that VHD. The ISO has to be able to fit fully decompressed. So if your ISO is still in a ZIP file, decompress it and go 1GB above its folder properties listed size.
- Once the VHD is created on your IODD drive, you need to actually mount that blank VHD to your computer.
- With the IODD drive connected to your computer, navigate to where the VHD is stored using the screen/menus on the IODD itself, and mount the empty/new VHD file through the drive, and your computer will detect and pop-up that it has found a drive that needs to be formatted.
- Don't format the drive! Just close out the notification and close any explorer windows that may have opened.
- Now, using a program such as Rufus, you can "burn" or apply an ISO disk image to the new/empty VHD that you just mounted to your system!
- Burn the disk image just like you are creating a bootable USB or DVD; nothing special needs to be done to make things work.
- Lastly, to create an RMD of the VHD you just created, simply make a copy of the VHD file (so you have two) and simply change the copy's file extension from *.vhd to *.rmdThat's it!
IODD Help Site:
https://help.iodd.kr/bootable-virtual-drive/drive-setupIODD Help Page for VHD Creation:
https://help.iodd.kr/bootable-virtual-drive/virtual-drive-vhd/convert-iso-file-to-uefi-bootable-driveIODD User Manual:
http://dir.iodd.kr/vhd_tools/iodd_virtual_USB_drive_guide_0425.pdf
Labels:
bootable drive,
bootable usb,
disc image,
disk image,
external drive,
IODD,
ISO,
odd,
rmd,
ssd,
vhd,
virtual drive,
virtual optical drive,
virtual usb,
virtual usb drive
Thursday, April 28, 2022
M.2 SSD Not Detected by Windows 11/10 Installer
If you experience that the Windows installer cannot find your M.2/NVMe drives when installing Windows 11/10, try this process of loading the Intel IRST driver to gain access to your SSD drive!

For the Intel CPU platform, you need to manually install Intel Rapid Storage Technology (IRST) driver during the Windows installation process. You can also refer to the Intel document of How to Configure RAID or Intel Optane Memory with Intel RST on an Intel VMD Capable Platform.
Note: The following pictures are a reference, it may be varied depending on the different versions.
Manually install Intel Rapid Storage Technology (IRST) driver
- Download Intel Rapid Storage Technology (IRST) driver Download Link.
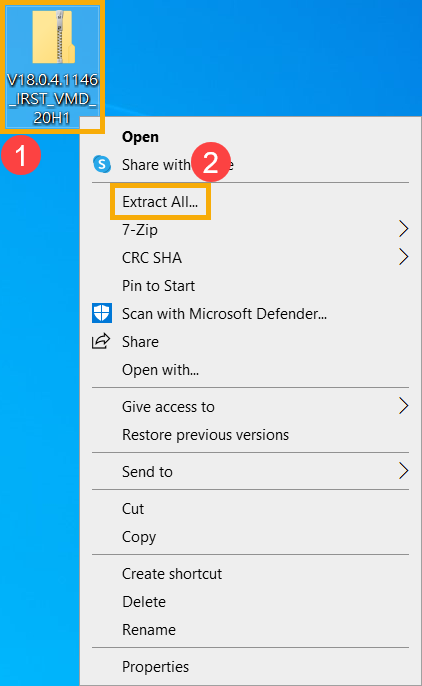
- After downloading the driver, right-click [V18.0.4.1146_IRST_VMD_20H1] compressed file① and select [Extract All]②.

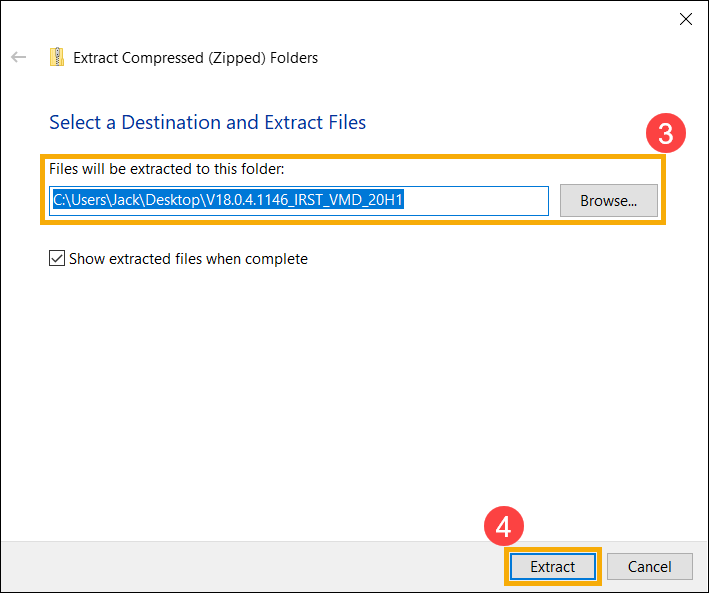
- Select a Destination③ (such as a USB thumb drive) and click [Extract]④.

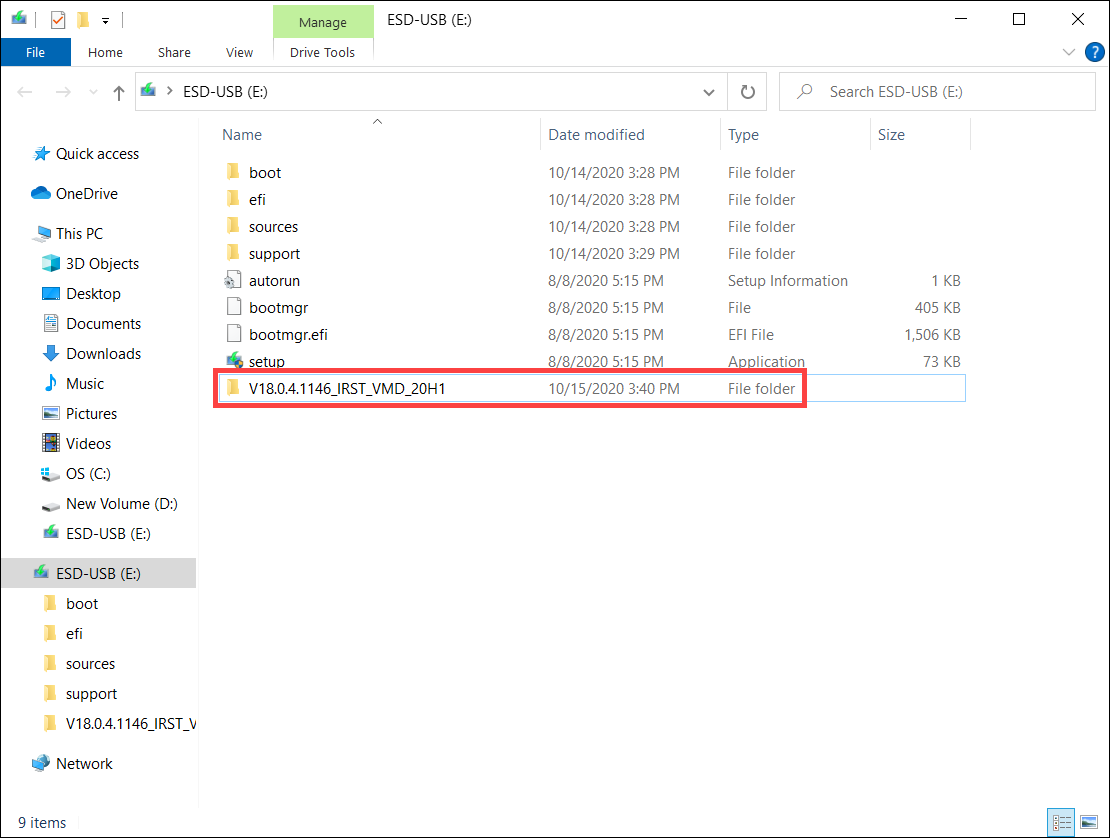
- After the extraction is completed, please copy the entire folder (V18.0.4.1146_IRST_VMD_20H1) to a USB flash drive.
- If you used a USB flash drive to create the Windows 11/10 installation media as well, please copy the entire folder to the same USB flash drive which is created as the Windows 11/10 installation media.

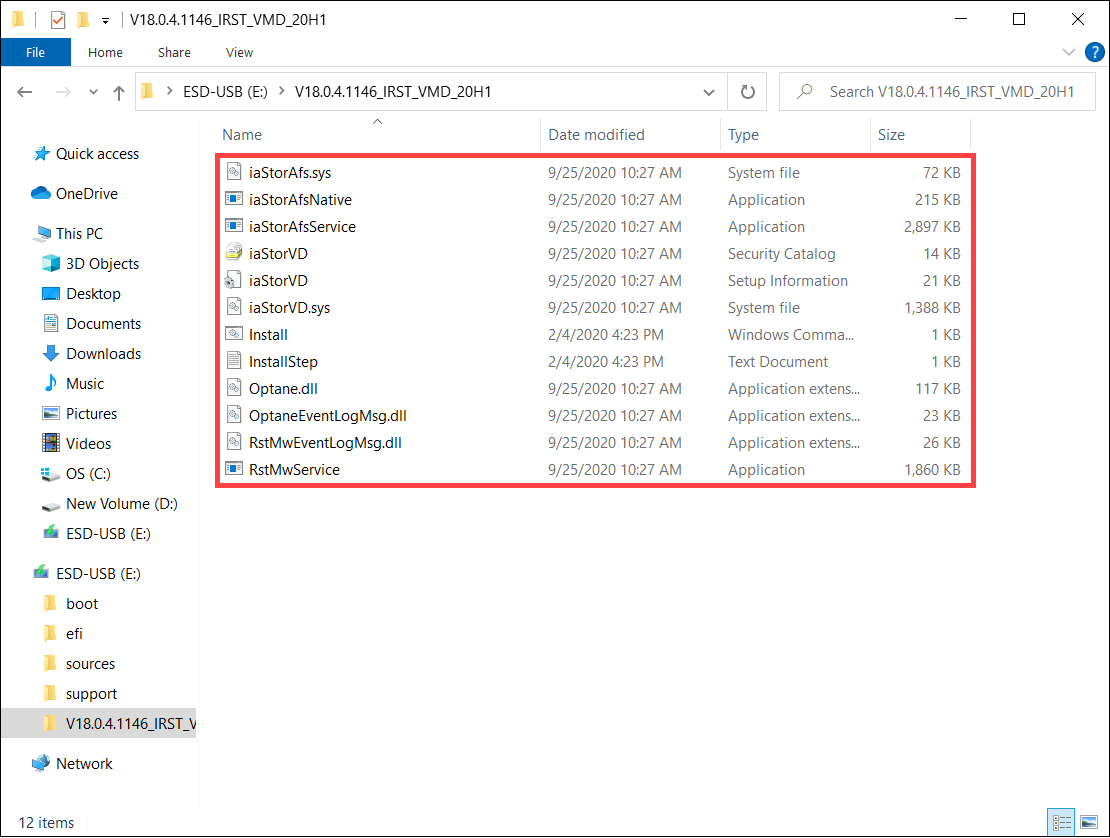
- After the copying is completed, make sure the folder includes the following files.

Install Intel Rapid Storage Technology (IRST) driver
- Connect the USB flash drive which includes the Windows 11/10 installation media and Intel Rapid Storage Technology (IRST) driver (V18.0.4.1146_IRST_VMD_20H1 folder) to the target computer. (If you used a DVD to install Windows 11/10, please insert the DVD and consist of the above files USB flash drive to the target computer together.)
- Restart the Windows 11/10 installation process, here you can learn more about How to use installation media to insatll Windows 11/10.
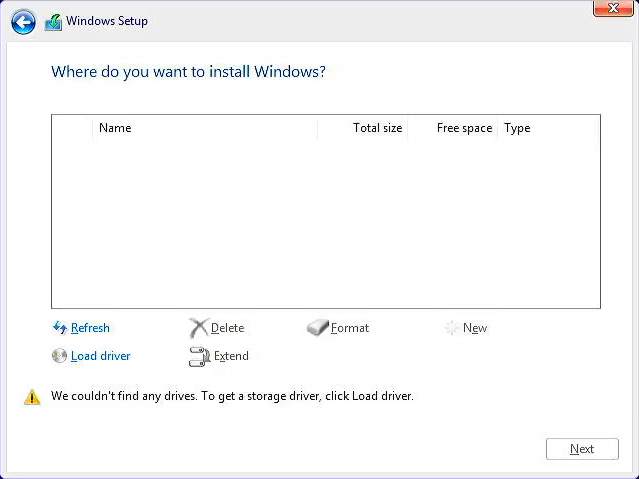
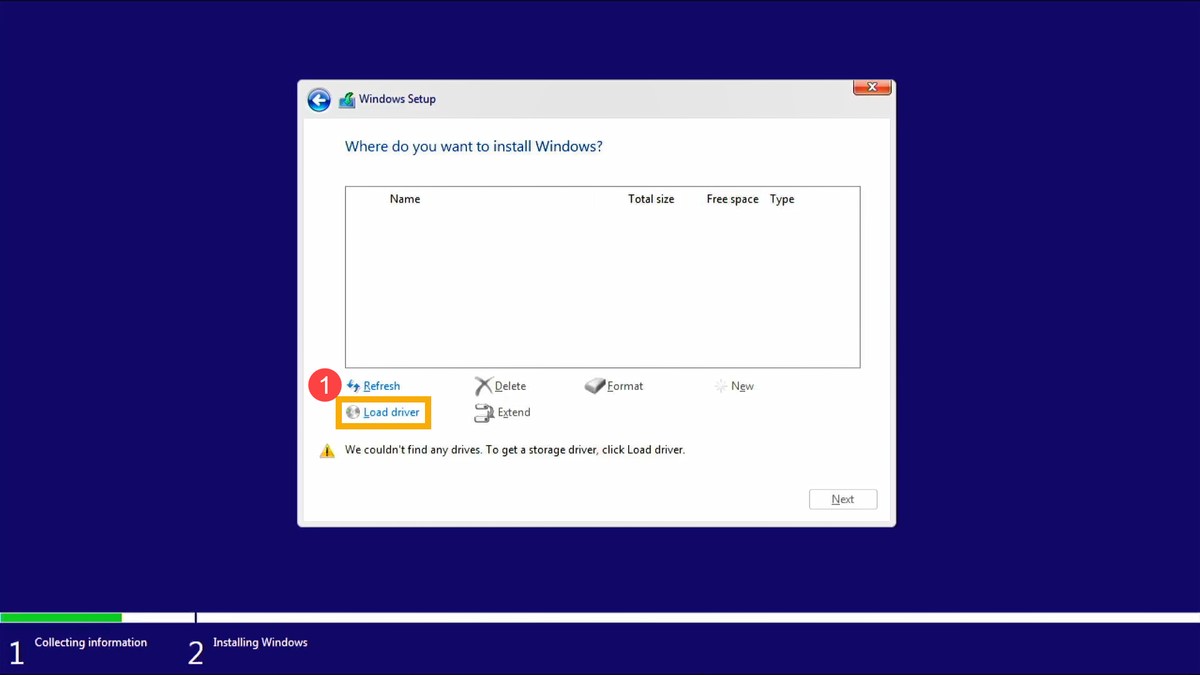
- On the screen of Where do you want to install Windows and Windows cannot find any drives, please select [Load driver]①.

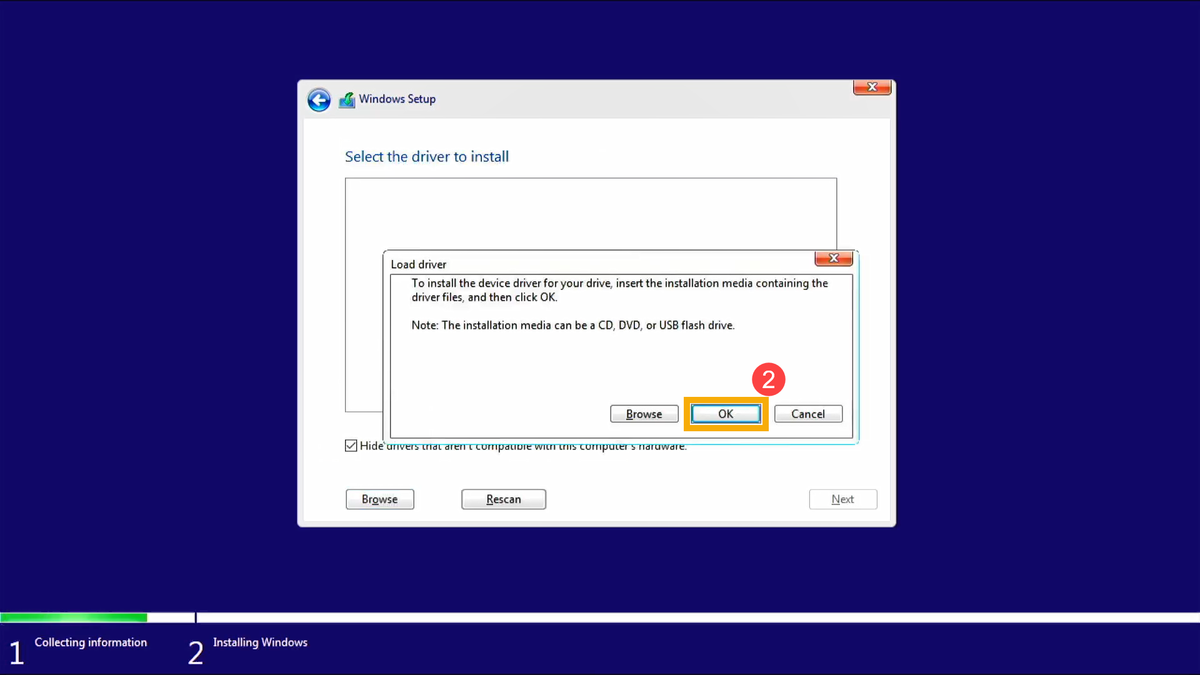
- Select [OK]②.

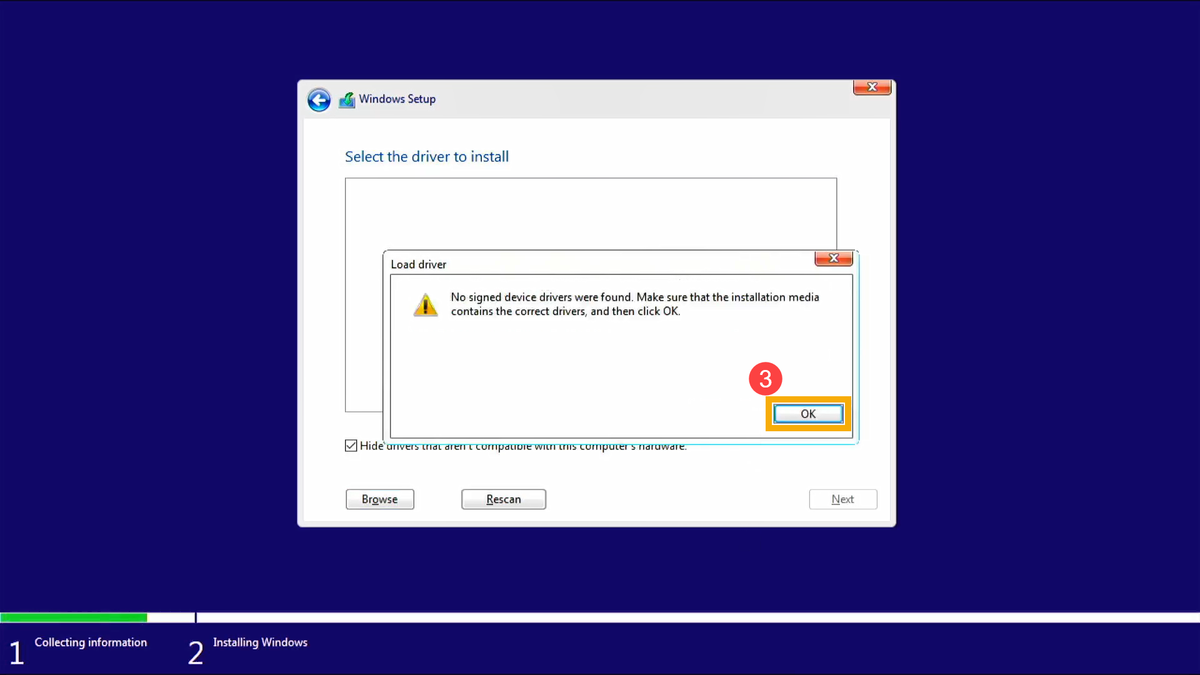
- Click [OK]③.

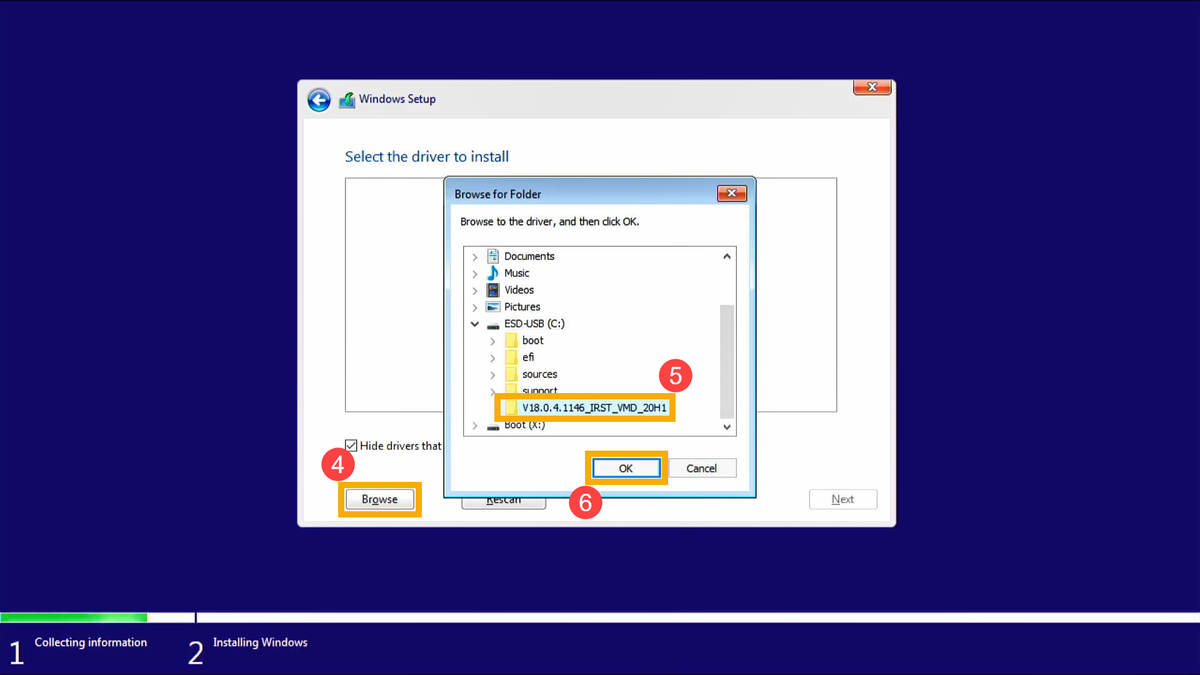
- Select [Browse]④, then find the [V18.0.4.1146_IRST_VMD_20H1] folder⑤ and select [OK]⑥.

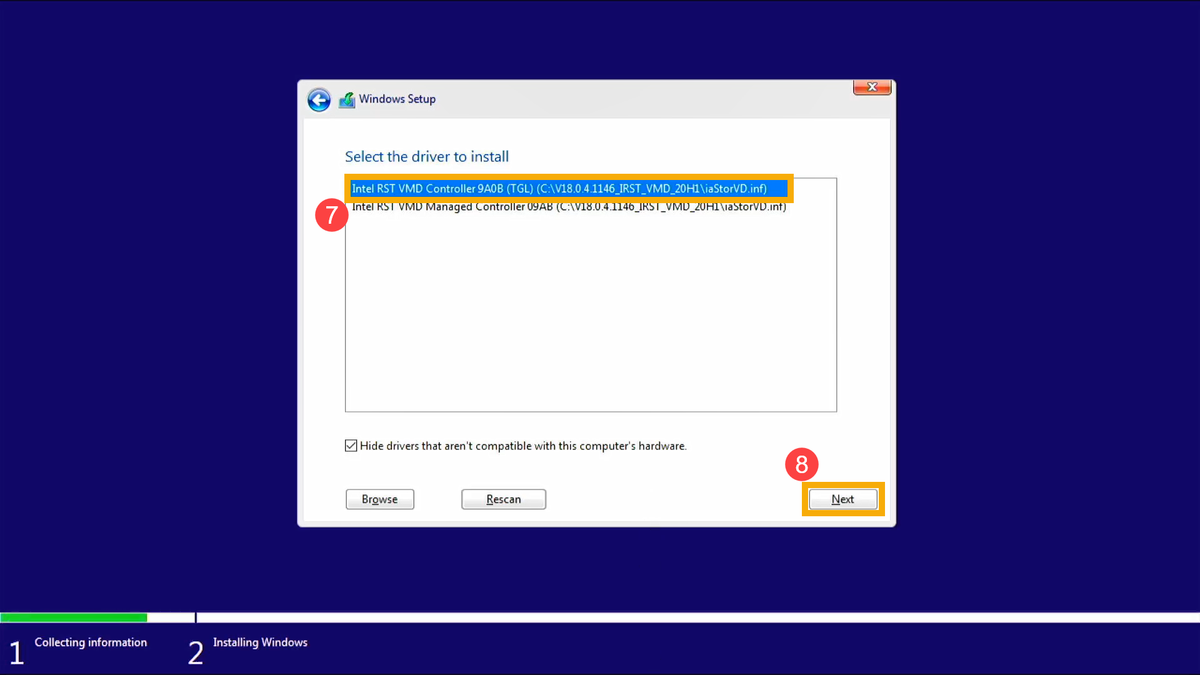
- Select [Intel RST VMD Controller 9A08 (TGL) ]⑦, then select [Next]⑧ to install the driver.

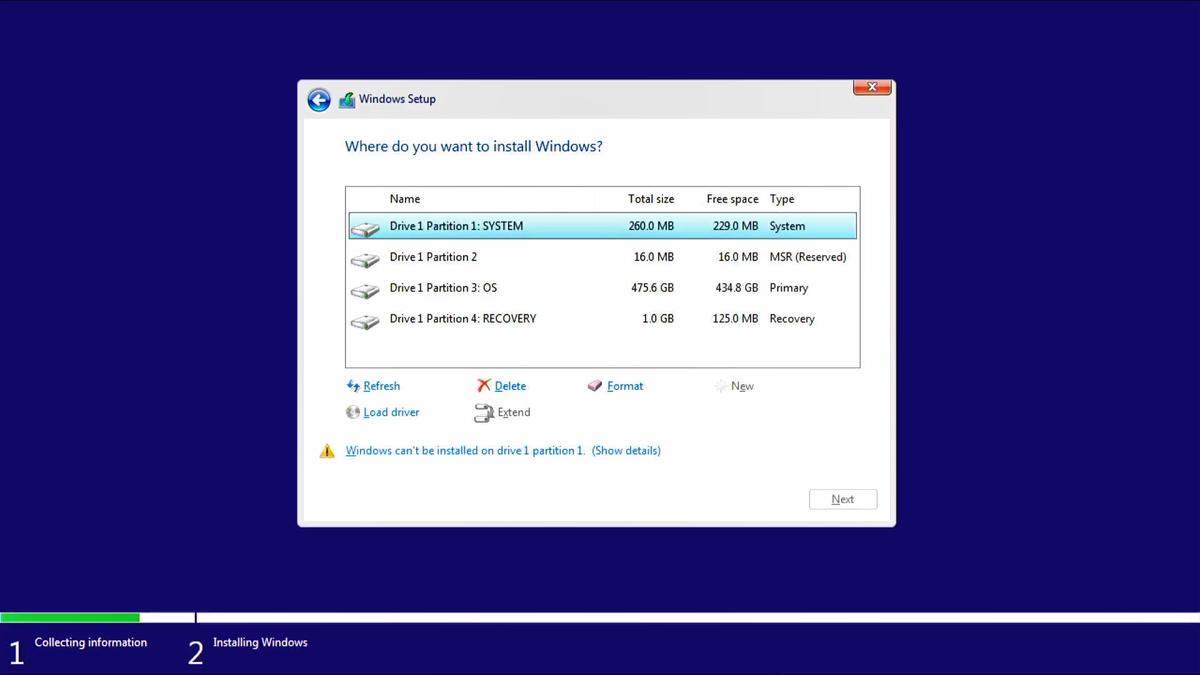
- After the driver installation is completed, the drives will appear normally.

That's it!
The Windows installer should now see your M.2/NVMe drive!
Original Article:
https://www.asus.com/support/faq/1044458
Labels:
driver,
hard drive,
intel,
intel raid driver,
m.2,
nvme,
nvme drive,
RAID,
raid driver,
rapid storage technology,
ssd,
ssd drive,
windows,
windows 10,
windows installation,
windows11
Subscribe to:
Posts (Atom)