Wednesday, February 16, 2022

Mac Battery/Power Management System Calibration

Calibrating The Battery/Power Management System of a Mac Is Easy To Do!

On a new Apple computer, or after a new battery is installed...

Step 1 – Charge The Battery To 100%

  • Shut down the computer and then connect the power adapter.
  • Keep the computer plugged in until the light on the power connector turns green indicating a 100% charge.

Step 2 – Charge Two More Hours

  • After the battery is 100% charged, keep the power adapter plugged into the computer for an additional 2+ hours. 
  • The computer can be powered up and used during this time.

Step 3 – Temporarily Change the Energy Saver Settings

  • If the computer is off, you'll need to turn it on.
  • In OS X System Preferences click on the Energy Saver preferences.
  • In the Energy Saver / Battery preferences:
    • Set the "Turn display off after:" slider to "Never"
  • Various Mac models may have two sliders for "computer sleep" and "display sleep". If you have two sliders, simply slide both to the right to set them to "Never"
    • UNCHECK "Put hard disks to sleep when possible"
    • UNCHECK "Slightly dim the display while on battery power"
      • Note: The location/existence of certain settings may shift or vary depending on your computer model or OS version.
  • In the Energy Saver / Power Adapter preferences:
    • Set the "Turn display off after:" slider to "Never"
    • Various Mac models may have two sliders for "computer sleep" and "display sleep". If you have two sliders, simply slide both to the right to set them to "Never"
    • CHECK "Prevent computer from sleeping automatically when the display is off"
    • Note: this setting may or may not be available depending on your model or OS version.
    • UNCHECK "Put hard disks to sleep when possible"
      • Note: The location/existence of certain settings may shift or vary depending on your computer model or OS version.

Step 5 – Unplug And Drain The Battery

  • Unplug the power adapter.
  • Leave the computer on until it automatically shuts down.
  • You can use the computer during this step, but don't put the computer through heavy use to deplete the battery faster. Steady, even usage is better for power system calibration.

Step 6 – Leave It Off And Unplugged

  • After the computer has automatically shut down, leave it shut down for at least 5 hours or overnight. 
  • This will ensure the battery is completely drained of energy.

Step 7 – Charge To 100% Again

  • Plug the computer back in until the battery is 100% charged.
  • While plugged in, the computer can be used.
  • This is also a good time to go back and select your desired Energy Saver preferences.

AND THAT'S IT!

After this essential calibration, the new battery will be able to achieve its fullest charge and reach its full lifespan, and the system will display an accurate battery level. You can also reuse these steps to recalibrate the power management system every few months if desired.

Monday, April 26, 2021

Monitor & Printer Color Calibration - PC


Printing out images can sometimes produce different colors and tones than you might expect. Here are a few ways to make sure your screen and printer are properly calibrated.

  • DON'T USE STANDARD PRINTER/COPY PAPER!

  • Get a Professional Graphic Design Monitor; Even One Pre-Calibrated:

ViewSonic Professional 27 Inch 4K Monitor with 100% sRGB Rec709 14-bit 3D LUT Color Calibration for Photography and Graphic Design

  • Calibrate Your Monitor Colors - Windows 10:

  1. Click Search or Cortana in the lower-left corner of your display.
  2. Type "Calibrate Display Color".
  3. Select "Calibrate Display Color" from the flyout menu to open "Display Color Calibration"
  4. If your system has more than one monitor, move the "Display Color Calibration" application window to the display that you want to calibrate and then click Next.
  5. Follow the instructions as they walk you through calibrating your monitor.

  • Display Color Management - Windows 10:

It's important that you make sure that both your monitor and your printer are using the proper ICC profile. You can see and change these profiles from the "Windows Color Management" dialog box. 
To get there, follow these steps:
  1. Click the "Windows Search" or "Cortana" icon in the lower-left corner of your screen.
  2. Type "Color Management".
  3. Click the Device drop-down menu.
  4. Choose your monitor from the list.
Note that if you did not install the drivers that came with your monitor, Windows may recognize and install its own profile for your display. Some inexpensive displays may not come with ICC profiles, and in turn, draw their calibration info from one of Windows' several generic profiles. And remember that, as mentioned, a good number of monitors come calibrated for office settings; the monitor may require some additional tweaking to get colors to match more closely to what comes out of your printer.

  • Printer ICC Profile for Paper Being Used: 

As for your printer's ICC profile, nowadays, nearly all printers come with them, which programs like Photoshop, Illustrator, and InDesign load and read as soon as you select the device from the printer list in the application's Print Settings (or equivalent) dialog box. You can also pick up ICC profiles from the hardware manufacturer's website or by contacting the company directly. When you have the profile in hand, you can install it in Windows in two steps:
  1. Right-click on the ICC profile file (it has a .icc file extension)
  2. Click "Install profile"
ICC Profiles and Monitor Settings Database

  • Hardware Color Profiler/Calibration Tool:
Monitor calibration kits and/or monitor-printer calibration kits, have been around for some time now and many of them work quite well. They range in cost from just less than $100 to more than $500. These devices can be your go-to for the entire process of calibration, or in addition to the steps listed previously. 

Datacolor SpyderX Pro – Monitor Calibration Designed for Serious Photographers and Designers


Hopefully, with all these steps complete, you should find that your prints are much closer to those on your screen.

Thursday, December 3, 2020

Ender 3/Ender 3 Pro 3D Printer/3D Printing "Dialing It In" Tips!

I created this guide to help Ender 3, Ender 3 Pro, and other Creality Printer owners get their printers and their prints "all dialed in" as I like to say. Let me know if you have any questions or issues and thanks for checking this out!


Dial-In Your Creality 3D Printer:

Overall printer test from Thingiverse. Start here!
https://www.thingiverse.com/thing:2975429
Then print this again after tuning your printer!


Chep Cura Profiles for Creality Printers:

Chuck Hellebuyck's Electronic Products Cura profiles for Creality printers, gives you a great starting point for using Cura with a Creality Ender 3, Ender 5, CR-10, and CR-10 Mini 3D Printers.
This way you can get started printing higher-quality prints, right out of the gate on your Creality 3D Printer! 


Bed Leveling:

If you do not have ABL (auto bed leveling) please check out this Chep guide below for easily getting your printer bed leveled and printing level: https://www.chepclub.com/bed-level.html

Propper Belt Tension:

A lot of people think, that more belt tension = better quality. That isn’t the truth at all. The perfect belt tension is when the belt isn’t really tight but teeth on won’t slip at all. Be sure, that you can normally push the belts together with your fingers, but when you move the carriage by hand, everything should be smooth, with no bumps, no weird sounds. To find this perfect spot I’d suggest you add a belt tensioner that will fit your 3D printer!

Calibrate the Extruder:

Increasing or decreasing the millimeter (mm) steps for your extruder so your printer is pulling/extruding the correct amount of filament. 
  1. The easiest way to do this is to make a mark on your filament about 100mm away from where the filament goes into your extruder. 
  2. Then heat up the printer's hot end and feed 100mm of filament through your extruder. 
  3. If all is dialed in correctly, the filament should stop RIGHT on the mark you created. 
  4. If you went past the mark a decrease in your steps per mm is needed. 
  5. If you didn't hit the mark at all; an increase in your steps per mm is needed.
  6. You can calculate deviation and your new/needed Esteps by using a simple formula:
    • Deserved length / Observed length * E steps per mm. 
    • Using a 105mm example: 100mm / 105mm * E200.00 = E190.47 new number of steps per mm for your extruder.

Print Temperature:

Run a temperature stress test to see what temperature is best for your printer: Stick to the temperature value you consider as the best one: https://www.thingiverse.com/thing:3071464

PID Auto-Tuning:

Poor temperature stability can be caused by both non-calibrated or disabled PIDs as well. There are a few ways to fix Z artifact issues caused by bad PIDs. I highly recommend this printer tuning/PID Tuning guide for both your extruder AND your heated bed: 
https://3dnation504795197.wordpress.com/guide/ 

How To Run Extruder PID Autotune from Terminal: 

  1. First home your printer on all axes (X, Y, Z)
  2. Next, move your Z axis 10mm up and X and Y to mid of your print bed. 
  3. After this turn on your blower fan to 100% by sending M106 S255
  4. Next, send the M303 E0 C8 S210 command to your printer, 
    • M303 declares PID autotune command for your extruder
    • E0 is the number of the extruder (E-1 is the bed, E1 is the second extruder)
    • C8 is the number of PID calibration cycles you will run
    • S is the desired temperature
  5. If print ABS or PETG most of the time, you can use S240 or the temperature value you'd like.
  6. Now, wait a few minutes until you see "PID autotune done" in your terminal window. Below that, you’ll see your new Kp, Ki, and Kd values. 
    • For example Kp 21.00, Ki 1.25, Kd 86.00. 
  7. You have to write these values to EEPROM now using the M301 command. 
    • Something like this: M301 P21.00 I1.25 D86.00 (Kp = P, Ki = I, Kd = D)
  8. Then save these new values to the printer's EEPROM by using the M500 command. 
  9. You can check, that you’ve done everything right by reading EEPROM values with the M503 command. 
    • If you see your PID values there under the M301 section, everything should be correct!

How To Run Heat Bed PID Autotune from Terminal: 

  1. Move your Z-axis 10-20mm up, and X and Y axis to the mid point of your print bed. 
  2. Send the M304 E-1 S60 C6 command to your printer, 
    • M304 declares PID autotune command for your heat bed
    • E-1 is the bed (E0 is the extruder, etc.)
    • S is the desired temperature
    • C6 is the number of PID calibration cycles you will run
  3. If print ABS or PETG most of the time, you can use S85 or the temperature value you'd like.
  4. Now, wait a few minutes until you see "PID autotune done" in your terminal window. 
  5. Below that, you’ll see your new Kp, Ki, and Kd values. 
    • For example Kp 10.00, Ki 2.00, Kd 5.00
  6. You have to write these values to EEPROM now using the M301 command. 
    • Something like this: M304 P10 I2 D5 (Kp = P, Ki = I, Kd = D)
  7. Then save these new values to the printer's EEPROM by using the M500 command. 
  8. You can check, that you’ve done everything right by reading EEPROM values with the M503 command. 
    • If you see your PID values there under the M301 section, everything should be correct!

Print Speed:

Run a speed stress test to see what speed(s) may be best for your printer: this will help you with stringing, bridging, and overall print quality.
https://www.thingiverse.com/thing:3071464

Slicer Retraction Settings:

You want to be sure that you have retractions turned on in your slicer software. You want to start with some lower values like 2mm retraction and 30mm/s retraction speed. Then you should print some retraction tests like this one: https://www.thingiverse.com/thing:2563909
This way you can find and save the retraction settings in your slicing software that produce the best results!

Stringing

Stringing happens when there is too much pressure in the extruder and melted plastic leaks out during movement in free space. There are 3 major values, which you are going to adjust to remove stringing: retraction, temperature, and travel speed. Tweaking those settings will help you get rid of stringing on your prints. FYI however, PETG is notorious for stringing! 
Some brands will string no matter what you do! So don't stress out too hard/badly.

Pre-Sliced tests for Ender 3 and Ender 3 Pro! 
Pre-sliced G-code for the Ender 3 printers (speed, temperature, and retraction) to help find your ideal slicing settings. Everything is covered in detail here:

https://www.thingiverse.com/thing:3071464

Tuesday, November 10, 2020

AMD Motherboard BIOS/UEFI Upgrades & Setup Service

AMD BIOS Upgrade & Setup ~ $80!

With an AMD Athlon 3000G, I can upgrade the BIOS on your AMD motherboard(s) to accept newer generation AMD CPUs! 
I can also set-up your motherboard with proper overclocks to maximize the performance of your installed RAM and CPU!

"AMD began the introduction of the new 3rd Gen Ryzen™ Desktop Processors in July of 2019. To enable support for these new processors on your AMD motherboard, an updated BIOS may be required. Without such a BIOS, the system may fail to boot with a 3rd Gen AMD Ryzen™ Processor installed." ~ https://www.amd.com/en/support/kb/faq/pa-100

Pacific Northwest Computers
Toll-Free ~ 1-888-533-6199
Local ~ 360-624-7379
SMS ~ 503-583-2380

*The advertised rate is for in-shop service. Onsite service would be charged at our normal hourly rate: www.pnwcomputers.com/rates.html

Monday, November 2, 2020

CenturyLink vs Xfinity! What Internet Provider is the Best!?

CenturyLink vs Xfinity

Out in the Pacific North West we only have two options when it comes to internet service providers: 

CenturyLink or Comcast

Only two?!

That's right!


Even if you are farther out in the rural areas and have service from TDS or SpiritOne, you are simply using rebranded internet from one of those two providers. So that leads us to one of the most asked questions that I get;

"What should I use!? Comcast/Xfinity or CenturyLink?!"


Well for starters, I have used both services for well over 10 years. But I am currently with Comcast/Xfinity Internet. I used CenturyLink for about 10 years when I lived in Battle Ground, WA, and briefly again when I moved to Vancouver, WA. But have been with Xfinity/Comcast for the last 10 years now. Not to mention the thousands of on sites I do a year (for the past 11 years), I see and deal with a LOT of networking and internet issues. So I think can safely say that I have a good understanding of how each of these companies works and operates.

When it comes to you how much Internet you get per dollar, CenturyLink right now is the king of the castle. With their new fiber Internet Service, they are able to get one-gigabit speeds to their customers at a cheaper price than you can get similar speeds from Comcast/Xfinity.

However, in my experience, I've found that CenturyLink had the most downtime and most extended downtimes of the two companies. For example, when I was in college I had a finals test to do through an online school. I was not able to complete that test due to a 72-hour outage from CenturyLink. I have had some outages with Comcast/Xfinity that sometimes have lasted most of the day or the night. But I have never run into such an extensive outage issue via Comcast/Xfinity.

Now the one issue I would definitely give a crown to Comcast/Xfinity four is the lack of the ability in their support team to properly identify and rectify issues with their customer’s internet connection and speed issues. For example, I recently upgraded to 1GB internet service at my home office. With a compatible modem and all, my internet went down for several days after the upgrade had occurred. They did get me up and running, but was not getting the speed I was paying for. In total it took over two weeks of phone tech support, and three visits from an onsite technician to get my Internet to working correctly. I have had similarly bad of issues getting tech support from CenturyLink as well, but I think Comcast/Xfinity beats them by a margin.

As a side note to all that I have explained bout Comcast/Xfinity so far, I would also bring attention to their Comcast/Xfinity business service. If you are a business, you don’t necessarily have to use their Business internet service. They purport that the business internet has a guaranteed uptime that the home internet doesn’t have, but have never found that to be true. If they have an outage, typically home and business services go down first. I will note, however, that business customers are prioritized for onsite service. That I can verify. However, you will pay more for your Internet dramatically less speed. So if you are a home-based business you most likely can just use Comcast/Xfinity home Internet!

The one caveat to all of that however is that if you use their business security nor their business telephone service you will have to use their business Internet. One recommendation I'd make to customers facing this type of dilemma is for them to get their security and telephone service through a different provider. Then simply get/use the fastest home internet they have available for your location!

So, when it comes down to it, what you REALLY are doing is choosing the lesser of two evils for providing you internet service.

  • If you don't have a home-based business/rely on the internet, don't mind extended outages because of a wind storm, you can get some cheaper FAST internet via CenturyLink.
  • If your day-to-day life relies on the need for internet (home business, student, etc.) then Comcast/Xfinity would be the way to go.

Again, this is all my opinion. But with my experience and expertise in the IT/IT support field, I hope this can help some folks make the decision between the two "King Pins" of Pacific Northwest internet; CenturyLink vs Comcast.


Monday, October 19, 2020

Protect Yourself From Cyber Attacks & Digital Fraud!


PROTECT YOUR INFORMATION

Make sure you know who you're communicating with.

  • Fraudsters pose as credible organizations, such as banks and the IRS, "phishing" for your information.
  • Be aware of COVID-related scams.
  • Criminals are taking advantage of the pandemic. Learn more about the top scams criminals are using during these difficult times.

Report suspicious texts and emails.

  • Fraudsters impersonate companies to get consumers to click links and provide personal information. These deceptive emails, phone calls, and text messages appear to come from a legitimate source.
  • Don't let online shopping scams trick you.
  • Before providing your billing information online, make sure you are working with a credible site. 
  • Don't download any software or click unknown links.

SECURITY BEST PRACTICES

Layer your protection.

  • A strong password is the first line of defense against cybercriminals. We recommend using multifactor authentication for an added layer of protection for all your accounts.

Be alert.

  • Monitor your accounts regularly, respond to fraud alerts, and report unauthorized transactions promptly.
  • Watch out for phishing attempts.
  • There are some easy ways to ensure an email is from "who you think" sent it. There are some simple methods to spot Email Spoofing, which you can find here.

Set your preference for digital documents.

  • Mailbox fraud has been an ongoing strategy for criminals. 
  • Safeguard your correspondence by signing up to receive digital information for your products and services instead of by Mail/USPS.
  •  Use a shredder to destroy paper documents when you are done with them.

Stay alert about industry trends on cybersecurity threats!

Wednesday, August 21, 2019

Business IT Services! Save your Business $$$!!

At Pacific NorthWest Computers, we don't have any monthly-fee type services or anything like that, as we don't provide "help desk style support".

But, we are preferred/dedicated IT provider for a lot of businesses in the area on a "call us as needed" basis!

How it typically works is we will schedule quarterly clean-up visits to check hardware, backups, check for bugs and perform software/OS updates; as well as address specific issues that you may be happening.

With this business model, we have helped nearly all of our business clients cut out HUGE monthly IT support bills, as well as provide a higher quality, and personable, level of care and support. We recently got a client out of a nearly $500 a month IT service contract, down to maybe spending $160-$300 every three months. That is a nearly 80% decrease in total IT costs just by switching over to us!

If your business is interested in cutting down on, and/or completely eliminating, bloated and overpriced IT support services, give Pacific Northwest Computers a call today!

www.pnwcomputers.com
360.624.7379

Tuesday, May 14, 2019

Can People Easily Find Your Business?

Can People Easily Find Your Business?

Is your Business listed on the major sales/services directory sites?

Do you have a social media presence; not just for followers but just to be found by their users?

Can users of different social, community, and information sites easily find you?

Clickfunnels, landing pages, blogs; do you need to implement all of those? Some of them? None of them?

Pacific NorthWest Computers​ can not only help more people find your company, product, or service but ALSO help search engines find pertinent info and data, all while building an Organic SEO system that runs on autopilot; helping increase your rankings, exposure, conversations, sales, profits, etc. With all of that in place, advertising is a piece of cake!

We then can help you INTELLIGENTLY use Google AdSense, Facebook Advertising, and Instagram Advertising using tools like Google Business, Google Search Console, and Google Analytics to intelligently approach and ATTACK your advertising campaigns. Get impressions, get those clicks, get those conversions and get those profits that have just been slipping by!

Interested? Setup a consult today!

Pacific Northwest Computers
www.pnwcomputers.com
360.624.7379
Jon@pnwcomputers.com

Only $100 per hour, and we can cover a LOT of ground in just an hour or two!!

Monday, January 21, 2019

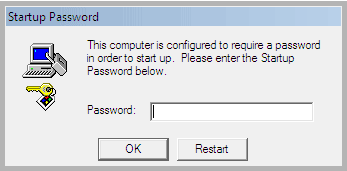
RansomWare or a Fake Tech Scammer Locked You Out of Your Computer using a "SysKey" Password

Image result for syskey attack

Some RansomWare Viruses and "Microsoft Tech" Scammers will Enable Windows' "SysKey" Function,
 and lock you out of your computer!

Well we have a few ways you can remove that pesky "SysKey,
and get you back into your computer!

*THIS IS FOR WINDOWS 7; MAY WORK ON 8 or 10 BUT THIS IS NOT TESTED OR CONFIRMED.

If this happens to you, the first thing you can try is use a Windows OS Media disk to remove the "SysKey" function using the Command Line.
  1. Boot to the appropriate OS Media (matches the installed OS version of the computer you are fixing). 
  2. When the OS installation screen comes up, Select USA English and then "Repair the Windows Installation"; DO NOT INSTALL!! 
  3. Go to "Advanced Troubleshooting" 
  4. Click on "Advanced Repairs" 
  5. Click on and open the the "Command Line" tool 
  6. Find the OS Disk by changing drive letters and checkin contents with the "dir" command. ie: cd C: cd D: cd E:, etc. 
  7. Run the following command on the OS drive:
    copy c:\windows\system32\config\regback c:\windows\system32\config 
  8. Say no to the "Software" replace prompt, but say yes to the others and replace a total of 4 files; Default, SAM, Security and System. 
  9. Reboot system 
You should be able to login to the computer again!
A warning however, you may have some security, OS and/or user account damage after the fact.

However there is an alternate method (or two) that can also do the trick, if the above process does not work, or is too difficult!

I have also removed the "Syskey" password using the following procedure:
  1. Boot from a Windows 7 Install DVD/Thumbdrive, or boot from a user created Windows Restore/Repair Thumb Drive.
    *You can also attempt the same procedure from Windows Start-Up Repair; if you are able to get there. 
  2. When the "Install Windows" screen appears, click on "Repair your computer" to access the system recovery options. 
  3. From the nex screen, run System Restore to last point before the syskey password on your computer.
    *This will fail, but must be done! 
  4. Click "run system restore again" and this will take you back to the main system recovery options list. 
  5. Open Command Prompt from the main system recovery options list. 
  6. Open Regedit; type "regedit" without the quotes, into the command prompt and the Regedit application will open. 
  7. Navigate to: HKEY_LOCAL_MACHINE\System\CurrentControlSet\Control\Lsa and change the 'SecureBoot' value entry from 1 to 0. 
  8. Navigate to: HKEY_LOCAL_MACHINE \SAM\SAM\Domains\Account and delete everything for "F value" so that it's data/value is 0000 
  9. Reboot and you should now be able to Login! 

If you are not able to boot into the Windows 8 or 10 Startup Recovery Environment there is still yet another repair method you can try!

To get the computer to run a system restore if you can't get into the recovery environment, you try to make/trip the computer into doing a Startup Repair. 
  • The way we do this, is by turning the system off mid boot and then Startup Repair should catch that "issue" and run the next time you power on. 
  • During this process Windows typically recommends running a system restore to fix any possible boot issues; allow this process to proceed and complete. 
  • After this process has completed, open the computer's DVD drive and insert a copy of Hiren's All-in-one Boot CD/thumb drive. 
  • Turn the system off/restart the system. 
  • Booting from DVD or USB, boot into the Hiren's All-in-one Media and select "Mini XP Recovery Environment" 
  • Allow your system to boot into the "Mini XP Recovery Environment" RAM Drive environment. 
  • Once booted into "Mini XP" you can now run the built in Registry Editor (regedit) to complete the registry edits needed and listed in the previous repair steps. 
This procedure lets you complete the same repair tasks but using a different access methods and tools, but the same general repair principles and process.

These all have worked for me on client machines and has allowed me to get passed a "syskey" password each time. Once I am able to login to the client's system, I will physically disconnect the internet and start my cleaning procedures on the affected system. After a full clean-up, software removal and tune-up the once locked PC will now run fine without the user getting locked out anymore!

I hope this helps general users or other IT professionals!

Pacific Northwest Computers
Jon Pienkowski - Owner/Operator
www.pnwcomputers.com
360.624.7379

Thursday, January 10, 2019

Make 802.11ac Work Correctly On A Linksys WRT1900AC


Make 802.11ac Work Correctly On A Linksys WRT1900AC Router


I have had a Linksys WRT1900AC router for quiet sometime now, and in it's name it says that is an AC router. Since I have AC compatible Wifi devices, theoretically I should be able to get a max speed of around 1300 Mbps. In reality it would likely see something around 600 Mbps to something around 1024 Mbps due to the connections being wireless and can have interference. What I recently discovered though was that I was getting 802.11n speeds on my devices. I found that to be weird. So  I checked the route's settings.

Under "Network Mode" in the router's settings (logged in through a browser via the router's IP address), I found that the only options for wireless network modes were for A, N or A/N. But nowhere in the menus/options does it specify an option for 802.11ac!?


That was baffling to me seeing as this router is capable of doing 802.11ac according to Linksys AND it's in the devices NAME. So I figured that I was doing something wrong or I was not looking in the right place. Naturally, I checked their FAQ section and found nothing on this.
I also did what I tell ALL my customers to do and read the manual; found no assistance there.

After doing someone line research I found that if flipped the setting in "Network Mode from A/N only to Mixed (and after a reboot of the router) I had 802.11ac speeds! This router apparently HAS to be on "Mixed Mode" for AC speeds to be achieved. Very odd that Linksys would NOT include an AC option in the "Network Mode" section in the router settings, or make it more clear the A/N mode disables/prevents AC speeds all together.

Since I was able to figure it out, I wanted to make this post to hopefully help folks out that find themselves with the same or similar issue!

Pacific Northwest Computers
www.pnwcomputers.com
360.624.7379

Monday, May 7, 2018

Identify and Remove Un-needed Programs from your PC or Mac!

Ever wonder how to clean out your computer? Many people do, because it’s not unusual to have your PC filled with adware, toolbars and other programs you no longer need or probably never intended to install in the first place. But like most people, what programs should you remove is the tough question. 

Well we have your answer!
For PC users, you just simply need to visit and download "Should I Remove It?"! "Should I Remove It?" is a tiny, lightweight program designed to show you what programs you have installed on your computer and quickly determine what programs you can safely remove.
For an even deeper clean, we can't recommend CCleaner enough! CCleaner can help restore your system speed by removing unnecessary files taking up room on your hard drive as well as clear out errors and broken settings to improve stability. CCleaner can also help boost your browser speed and help protect your privacy by securely erasing tracking cookies and history!

Now, for the Apple Computers, there is CleanMyMac.com. CleanMyMac finds the junk that got installed on your Mac and full system cleaning. It helps you figure out if your system has extra/unneeded add-ons installed and even left over junk files from old programs and software/system upgrades. When everything on your Mac works twice as fast, you accomplish more every day. All you need is the right tool to make your Mac clean and fast again. CleanMyMac is perfect for the job: it removes the clutter from hard drive and speeds up your system. Plus, it’s super easy to use!

Should I Remove It? ~ www.shouldiremoveit.com <-- clean-up="" div="" program="" windows="">
CCleaner ~ www.ccleaner.com <-- cleaning="" deep="" div="" program="" windows="">
CleanMyMac ~ www.cleanmymac.com <-- app="" clean-up="" div="" macintosh="">

Pacific Northwest Computers
www.pnwcomputers.com

Monday, March 12, 2018

Run macOS in Windows via Virtual Machine!


With a few downloads, a hand full of steps to follow, you can have a Virtual Apple computer running on your Windows PC. That's right! Your eyes are not deceiving you. You can create a macOS virtual machine using VMware Workstation Player! Have access to the apps, tools, programs that you love about your Apple computer, all on your Windows PC!! No "hackintosh" required.

The link for the tutorial is below and will require you to download and install several programs as well as modify a config file using NotePad. Nothing crazy, but there are quiet a few steps involved. So read carefully and pay close attention to each step.

Link: Run macOS High Sierra OSX via Virtual Machine on a Windows PC!


**A few quick notes regarding this guide!**

  • VMware Virtual Workstation Player us up to version 14. However the needed "unlocker" utility that makes VMware Workstation Player compatible with OSX is ONLY compatible with copies of Version 12 VMware Virtual Workstation Player. So DO NOT download the newest version of VMware Virtual Workstation Player; only use copies of version 12.
  • You DO NOT need an ISO or currently OSX installation media. The tutorial has a link to have to download the Intel version of the Mac OSX virtual machine. This virtual machine is provided courtesy of the excellent fellows at Techsvidrewer.

Thank you PCSteps.com for creating such an easy to follow and thorough setup/install guide!!

Pacific Northwest Computers
www.pnwcomputers.com

Friday, January 12, 2018

Cryptocurrency GPU Mining Rig Parts List

Basic Parts List for a GPU Cryptocoin Mining Rig:


*The goal with your motherboard is to have as many PCIe 1x and 16x slots as you can get!
**You can also go with Pentium-Dual core or any other low-cost/low-power CPU's.
***You can use a high-speed thumb drive instead of a SSD or standard HDD if you are going to be using a Linux or any "small footprint" mining software/distro.
****You can go with any 1000+ Watt PSU as long as it is at least Gold/Platinum 80+ Certified.

Tuesday, September 19, 2017

Ransomware; What You Need To Know


With the popularity of the "WannaCry" ransomware bug that went around in early 2017, most folks are pretty familiar with the term Ransomware (aka an extortion virus). If you are not familiar with term, essentially a Ransomware virus is bug that usually gets into a system through an infected attachment via a fake Email. Once the email is opened, the virus activates and immediately starts to seek out and encrypt Word Documents, Excel Spreadsheets, Pictures, Music; anything it can get it's hands on. It is a VERY destructive type of attack and if not prepared, you could loose all of the precious data that is stored on your computer and connected to your computer!

So what is Data Encryption?

Data encryption is a way to lock a file, or any type of data on a hard drive, very securely. Encryption essentially locks a file with a nearly unbreakable secret password, key, etc. Once a file has been "locked" or encrypted, you need have to have the secret key or password to be able unlock and access file(s) again. The key or password is what enables you to decrypt, or "unlock" the file, and have access to all your stuff again; pictures, documents, music, etc. So what the scammers are trying to achieve with deploying Ransomware is to lock your data up and then extort money from you to get your data back. Essentially make you pay a ransom to get your data unlocked and accessible again.

What can you do to protect yourself from Ransomware attacks?


  1. BACKUP YOUR DATA: Back up your files remotely every day, but only on a hard drive that is not connected to the internet. So long as you back up files on an external hard drive, you won’t lose any information if hit by a ransomware attack.
  2. NEVER OPEN A SUSPICIOUS EMAIL ATTACHMENT: And never download an app that you haven’t verified with an actual store. Read reviews before installing programs.
  3. SCAN ALL DOWNLOADS: Some antivirus programs have the ability to scan files to see if they might contain ransomware. Make use of them before downloading any questionable attachments from email or software from the internet.
  4. EXTRA PROTECTION: If you want take things a step even further, BitDefender does have an Anti-Ransomware security tool you can install and run on your computer to supplement (and work in conjunction with) your existing security software:
    www.bitdefender.com/solutions/anti-ransomware-tool.html

What do you do if you have already gotten infected with Ransomware?

If your computer has been attacked by ransomware, you can explore the free ransomware response kit (from ZDNet) for a suite of tools that can help with a ransomware attack.
Pacific Northwest Computers also recommends the following to moderate an attack as well:
  1. Remove the infected machines from the network, so the ransomware does not use the machine to spread throughout your network!! VERY IMPORTANT!!
  2. Decide whether or not to restore from available backups, try to decrypt the encrypted data, or pay the ransom and take it as a lesson learned.
  3. Research if similar malware has been investigated by other IT teams, and if it is possible to decrypt it on your own. About 30 percent of encrypted data can be decrypted without paying a ransom. Some of those tools are listed below:
If the none of the available decryption tools work (or a decryption tool is not available for your specific type or Ransomware) data recovery could be a last resort option. There have been cases where when the Ransomware virus attacks and the data encryption first occurs, the original file is actually copied and then deleted, and the copied file is what gets's encrypted! So we can try to recover those original files!

If you have been hit by a Ransomware virus, you need Ransomware Data Recovery, or you are interested in getting some systems in place to be prepared and protected in the case of a Ransomware attack, feel free to reach out to us!
Pacific Northwest Computers


Jon Pienkowski ~ Owner/Operator
360.624.7379

Monday, May 15, 2017

WannaCry Ransomware Virus


The now infamous "WannaCry" ransom-ware virus has been making headlines and scaring a lot of computer users around the world. It is one of the quickest spreading Ransom-ware bugs that has been released to date, but Ransom-ware viruses are not anything new.

Ransom-ware viruses are a type of virus that infect computers, and then prevent the user from accessing the operating system, or encrypting all the data stored on the computer. Then the user is asked to pay a fixed amount of money as ransom to unlock their files, allowing them to regain access to the operating system and their data again. What sets this virus apart is how quickly and widely it has spread.

As of yesterday a Security Professional, Marcus Hutchins, has been credited with stopping the WannaCry ransomware attack from spreading across the globe, by accidentally triggering a "kill switch" found in reverse engineering the virus. So for now, further infection has been stopped. But to prevent any infections from previous distributions of the bug you can do the following:

"WannaCry" Ransomware Guidelines to Stay Safe:

  • Be careful to NOT click on harmful links in your emails! 
  • Even with security software installed, if you open/download an attachment from a malicious email it can and will infect a computer and network! 
  • If you get an email from someone, look at the email address/email header and make sure it's from who it says it is. 
  • Be aware of fraudulent e-mail messages that use names similar to popular services such as PayPal instead of PayPal or use popular service names without commas or excessive characters. 
  • Be wary of visiting unsafe or unreliable sites 
  • Never click on a link that you do not trust on a web page or access to Facebook or messaging applications such as WatSab and other applications. 
  • If you receive a message from your friend with a link, ask him before opening the link to confirm, (infected machines send random messages with links). 
  • Always make have the latest update for your Antivirus; Let me know if there are any update issues! 
  • Make sure your windows have the latest updates to close the gap! 
  • If windows has reported that updates are pending/available; download and install immediately!! 
Further Steps to take in-case you WERE to get infected by the "WannaCry":
  • Make a recovery disk! The WannaCry ransomware asks for $300 or more if you a modified version if you do not pay the creators (in Bitcoin to its untraceable and not refundable) encrypt all of your files on the computer. 
  • If your computer gets infected take it off of your network immediately! The ransomware will spread to other computers on the network! You can restore from a backup. 
  • If you would like our assistance with ANY of the procedures above or would like us to secure your computer and/or network to the best of it's ability, let us know and we can schedule an onsite or remote session for you!! 

More from Microsoft on the bug and associated patches to help prevent infections from WannaCry:
https://technet.microsoft.com/…/libr…/security/ms17-010.aspx


Jon-Eric Pienkowski
_________________________
Pacific NorthWest Computers
(360) 624-7379

Wednesday, April 12, 2017

Security & Performance for your PC!!

I get asked all the time, “Jon, what do you recommend for security and performance for my computer?” So I decided to give folks a brief, and to the point, run down of what I programs and tools I use and recommend.

So, core security: I typically use and install Avast Free or BitDefender Free Antivirus (MS Security if Windows 7). Then I always use (and have used for years) MalwareBytes Antimalware and Spybot Search & Destroy. MalwareBytes is a Zero-day exploit and “name brand” bug catcher King and Spybot can find a lot of stuff that normally would get left behind and can also undo damage a virus has caused to your system. But you do not want them to be running all the time, as your Antivirus is providing that protection. MBAM (MalwareBytes for short) and Spybot are just "tools in the toolbox" per say. Include them in your routine scans and cleanings but they will be your go to, if and when a virus gets around your Antivirus. But the basic "run it when you need it" free versions are all you need (unless you have computer with horsepower and speed then let em rip!).
Then with the new variant of malware being “browser hi-jack” bugs, if you get hit with something like that, all those other security programs may not be able to find all of them; or even any of them at all! So that is where ADWCleaner and JRT come in to play. Both are now distributed by MalwareBytes (so that's who you will likely download them from as an FYI), they are specifically browser hi-jack clean-up tools. These tools will find, fix and remove what the other programs cant. Including website re-directions, search engine and homepage hi-jacks, removal of malicious add-ons, and much more.

Then last but not least, lets keep the computer clean of junk!

Class, meet CCleaner. CCleaner; class.

CCleaner has been my go-to performance and clean-up tool for nearly my entire professional computer career. Junk, temp and cache files, prefetch data, DNS cache, delete free space; CCleaner can do A LOT! So to keep things clean and your computer running snappy, I highly recommend it’s installation and use!

You can find direct download links to all the previously mentioned programs, as well as a complete virus removal tutorial just by clicking the link below! Doesn’t get much easier than that ;)
Recommended Software Downloads & Virus Removal Tutorial

As always, if you need any kind of computer or “tech” help, or if you have any questions, feel free to get in touch! This is why I do, what I do :)

Jon Pienkowski 
Pacific Northwest Computers 
360.624.7379

Thursday, September 8, 2016

Winning Against Windows 10: Fight Microsoft and Win!


Ever since the release of Microsoft’s “Free Upgrade” to WIndows 10 (which came to and end August 1st 2016), I have fixed dozens of computers for people which had system damage or issues stemming from an unwarranted upgrade of their computer to Windows 10. The upgrade to Windows 10 was free for Windows Vista and Windows 7 users for almost a year, but was supposed to be an optional decision. The end user was supposed to decide on whether or not, or when, to install Microsoft’s “latest and greatest operating system”.

As well all know from either the news, friends, family, or even personal experience, Windows was tricky with this OS upgrade and many people were automatically upgraded without direct and clear consent or without any knowledge until it was too late. If they did agree, some users had major issues with system stability, hardware, and software following the upgrade to Windows 10. Not the smooth process Microsoft said it to was to be... This means repair costs for folks as well as the inconvenience of downtown, as well as lost work and income for business.

Well recently I had a customer whose business computer went down due to a non-user initiated Windows 10 upgrade. The upgrade actually didn't complete correctly, killing the Windows OS upgrade installation (mid-install) requiring the system to be brought into the shop, have Windows 7 re-installed and onsite service to get everything set back up again. Well my client did some research and found a ebook on Amazon called "Winning against Windows 10".

"Winning against Windows 10" is the story of a woman named Teri Goldstein and specifically lays out how Teri fought back against Microsoft (due to a Windows 10 upgrade that messed up her system) and she actually was able to win; forcing Microsoft to reimburse her $10,000!!

Using the book (which gives you the specifics on her court case), my client was able to fight back against Microsoft themselves and was able to get Microsoft to reimburse them for all of the repair costs; onsites and all!

So if you have had any issues with Windows 10 "damaging" your computer and you had to get it fixed and/or can prove lost income from downtime, etc you could get Microsoft to pay you back!!


Any questions or comments?? Feel free to get in touch!
www.pnwcomputers.com

Thursday, July 7, 2016

Build Versus Buy a Computer??


Build Versus Buy....

The old debate over whether you should build your own system or buy a pre-built one is an old, long-standing argument that will never be easily washed away. However, there are some benefits to building your own system that can't be weighed in terms of dollars and cents. You may be happier with your own hand-built system, or you may be able to score bargains and rebates that lead to a more powerful computer stuffed with higher quality components than a manufacturer would use.

Building your own PC also gives you complete and full control over that system's components and extendability. Unlike buying an OEM PC, assembling your own gives you the ability to make decisions about when and how you'll upgrade that system in the long run as opposed to simply taking what the manufacturer sells you. For example, you can buy into a new motherboard chipset early and wait to spend money on the next generation of graphics card later, giving yourself a timely upgrade when the moment-or your budget-is right.

Ultimately, while it may be easier to just pull out a credit card and buy whatever's on sale from your preferred OEM, there's something about assembling the components of a system that you've selected for your needs, powering it up, installing your favorite OS, and using it every day that's' incredibly rewarding.

Exerpt from:Henry, Alan. "The Best PCs You Can Build for $600 and $1200." Lifehacker, Tips and Downloads for Getting Things Done. Lifehacker.com, 16 Sept. 2011.http://lifehacker.com/5840963/the-best-pcs-you-can-build-for-600-and-1200?popular=true

Pacific Northwest Computers 
360-624-7379

OSX Finder Crash Loop - FIX

PROBLEM: Your Mac’s finder is stuck in a crash loop Other apps work but your finder crashes and re-crashes indefinitely; even when the system is restarted. Other user accounts may work just fine and even a newly created account will work just fine. Permissions repair through the OSX DiskUtility doesn’t help either.
  1. Start with another user account or create a temporary administrator account. 
  2. Download and install PathFinder (search via Google) for all users. 
  3. Pin the PathFinder icon to your dock. 
  4. Log on with with your usual name and, with Pathfinder, move files that are in your Desktop folder, over to another directory. 
  5. No more Finder crash! 
Pacific Northwest Computers 
360-624-7379

Friday, June 5, 2015

How can I keep my computer from getting infected? Pacific NW Computers' PC Security Tips


1. Make sure you regularly run MANUAL scans with your installed security software!
Security Programs We Recommend (Or Have Installed):
  • Avast Antivirus, BitDefender Free, Microsoft Security Essentials
  • MalwareBytes Anti-Malware
  • Spybot Search & Destroy
  • CCleaner
*For direct download links to the software listed above, visit "Pacific NorthWest Computers' Links and Recommended Software" page on our Blog Link below!
http://pnwcomputers.blogspot.com/2013/06/pnw-computers-links-and-recommended.html

Basic/General Scanning Procedure:

  • Before running any scans with any of the installed security software, be sure to FULLY update the software FIRST.
  • After updating the security software, perform the deepest and most thorough scan that the software is capable of. This is usually labeled as a FULL or COMPLETE scan.
  • DELETE or QUARANTINE any and all of the security software’s findings.
  • Make sure you DON’T download and install any scanner/security software that solicits you to download and install its software. These scanners are blacklisted because of their questionable reputation.

2. Make sure your Windows is ALWAYS up to date!

  • An unpatched Windows is vulnerable and even with the “best” Antivirus installed; malware will find its way through.
    So visit http://windowsupdate.microsoft.com/ to download and install the latest updates.
  • Be sure to download and install all CRITICAL and SOFTWARE updates! You also may have to do several “passes” of Windows updates before all the available updates/patches are actually installed.
  • Verify that your version of Windows Vista, Windows 7 or Windows 8 has the most recent service pack installed. If this is not currently installed on your system, the Windows Update website will recognize this vulnerability and request you to download and install any available Service Packs and other needed updats.

3. Stay away from questionable sites.

  • This is one of the main causes why a computer gets infected. Visiting cracksites/warezsites – and other questionable/illegal sites is ALWAYS a risk. Even a single click on the site can be responsible for installing a huge amount of malware. Don’t think: “I have a good Antivirus and Firewall installed, they will protect me” – because that’s not true… there is no “Magic Bullet”. Before you know it, your Antivirus and Firewall may already be disabled because malware already found its way on your system.


4. Be careful with email attachments!

  • Malware spreads via email as well, especially email attachments. The most common ones are emails telling you that your computer is infected and that you can find the removal tool in the attachment, emails telling you that your password has changed and can find it in the attachment, emails with product codes in the attachment from software that you purchased (which you didn’t), emails with attachments that are so called “Security Updates”, etc. etc.
  • Don’t trust any emails like the ones listed above. Don’t even attempt to preview/open them and delete them immediately instead! It may also happen you receive an email from someone you know, but with a questionable attachment present and strange content in the e-mail’s message. In this case, this person – or someone else who has your address book in his/her address book – is infected with malware (worm/spambot) and sends these emails without being aware of it.
  • Don’t click links in emails from someone you don’t know, because these links can redirect you to sites where malware gets downloaded and installed.

5. When surfing the internet…

  • Use Google Chrome or the FireFox web browser as your MAIN internet browser. These browsers does not use ActiveX controllers or BHO’s (these are programs that are a standard feature’s of Microsoft’s Internet Explorer and are “exploited” vulnerabilities that hackers use to infect computers). If a specific website (such as a financial institution website) may require Internet Explorer to be used in order for you to view their site, then use Internet Explorer. But for that specific website ONLY!
  • Don’t click on links inside pop-ups. ALWAYS close the windows via the "X" for the window vs. clicking "Cancel" or any other 'escapes' in the pop-up.
  • Download software off of the internet from websites you know and trust. A lot of free software comes bundled with other software, including malware.
  • Be careful when you are viewing videos online. Especially when you get a pop-up asking you to download a “Codec” to be able to watch the video. By default, your media player should already have the necessary codec installed to watch online videos. In the case that you’re prompted to install an additional codec while trying to watch a move online (or downloaded), it is most likely a false alert and this so-called codec may install malware.
  • Don’t install plug-ins (ActiveX) if you’re not certain what it is or why it is you need it. (Unless you are attempting to perform Windows/Microsoft Updates).
  • Glubble is a great FireFox add-on if you want to manage the sites your kids are allowed to see.

6. Watch what you download!

  • If you want to install certain software, always go to the developer’s site to download the software. Then you can be sure you’re downloading and installing the right software. Be aware of the fact that certain software (especially freeware) may contain/come bundled with extra software including spyware and/or adware. So only install when you’re sure they are OK.
  • The use of Torrent sites, Game Patches and Mods, Emulators; really anything "Free" is always a risk. Unless the download/host site is a reputable site, you can never be sure what you are exactly downloading. A file you are looking to download or have downloaded isn’t always what it’s made out to be.

If you have any questions or comments please don't hesitate to get in touch!

Jon Pienkowski
Pacific NorthWest Computers
www.pnwcomputers.com
360-624-7379

Tuesday, April 21, 2015

PNW Computers' Favorite Mac Apps

PNW Computers' Favorite FREE Mac Apps


VLC is a free and open source cross-platform multimedia player and framework that plays most multimedia files as well as DVDs, Audio CDs, VCDs, and various streaming protocols.

Titanium Software ~ OnyX
OnyX is a multifunction utility for OS X which you can use to verify the start up disk and the structure of its system files, to run miscellaneous tasks of cleaning and system maintenance, to configure some hidden parameters of many of Apple’s applications, and more.

Titanium Software ~ Maintenance
Maintenance is a system maintenance and cleaning utility for OS X which you can use to run miscellaneous tasks of system maintenance: repair permissions, run periodic scripts, rebuild the databases, delete Application, Font and System cache, and more.

Derlien Software ~ Disk Inventory X
Disk Inventory X is a disk usage utility for Mac OS X 10.3 (and later). It shows the sizes of files and folders in a special graphical way called "treemaps".
If you've ever wondered where all your disk space has gone, Disk Inventory X will help you to answer this question.

smcFanControl
smcFanControl is MUST HAVE for keeping your Mac running cool. smcFanControl lets the user set the minimum speed of the built in fans; so you can increase your minimum fan speed to make your Intel Mac run cooler. However in order not to damage your machines smcFanControl doesn't let you set a minimum speed to a value below Apple's defaults.

ClamXav
ClamXav is a free malware scanner for Mac OS X. It uses the very popular ClamAV open source antivirus engine as a back end and has the ability to detect both Windows and Mac threats.
ClamXav can be setup up as passive or active: scan only the files you tell it to or your entire hard drive, whichever you prefer; you can also choose to activate Sentry to monitor your hard drive and scan new files as they arrive.

CCleaner is the number-one tool for cleaning your Mac. It protects your privacy online and makes your computer faster and more secure. Easy to use and a small fast download.

FreeMacSoft ~ AppCleaner
AppCleaner is a small application which allows you to thoroughly uninstall unwanted apps.
Installing an application distributes many files throughout your System using space of your Hard Drive unnecessarily.
AppCleaner finds all these small files and safely deletes them.
Simply drop an application onto the AppCleaner window. It will find for the related files and you can delete them by clicking the delete button.

With coconutBattery you are always aware of your current battery health. It shows you live information about the battery in your Mac and iOS device (iPhone, iPad, iPod touch) including:
  • Age of your Mac, iOS device and battery
  • How often the battery was charged
  • Your battery health (capacity in relation to the original capacity your battery had when it left the factory) and much more...
gfxCardStatus
gfxCardStatus is an unobtrusive menu bar app for OS X that allows MacBook Pro users to see which apps are affecting their battery life by using the more power-hungry graphics.

The Unarchiver is a much more capable replacement for "Archive Utility.app", the built-in archive unpacker program on Mac OS X. The Unarchiver is designed to handle many more formats than Archive Utility, and to better fit in with the design of the Finder. It can also handle file names in foreign character sets, created with non-English versions of other operating systems. I personally find it useful for opening Japanese archives, but it should handle many other languages just as well.

Monolingual is a program for removing unnecessary language resources from OS X, in order to reclaim several hundred megabytes of disk space. It requires a 64-bit capable Intel-based Mac and at least OS X 10.10 (Yosemite).

Hanynet ~ NoobProof (or WaterRoof) Firewall Software
NoobProof is a very easy tool. When you start it the first time you have a service list and you can choose to "allow" or "deny" connections to those services. So you have only to decide which service to allow, and then check "Activate NoobProof". You can also add selective "allow" and "deny", and you can delete or add new custom services in service list.
WaterRoof is a very complex and powerful tool, which allows you to configure almost every aspect and option of "ipfw". And more, you can list/manage active connections or network files, do graphics log analysis, configure your mac as a router with bandwidth management with tasteful rules and tons of other options. You need a good knowledge of "what a firewall is", and you should also have at least a basic ipfw knowledge.

TeamViewer - QuickSupport Remote Access Software
*What PNW Computers uses for remote support!
TeamViewer is the All-In-One Software for Remote Support and Online Meetings.
Remote control any computer or Mac over the Internet within seconds or use TeamViewer for online meetings. 

If you have any questions or comments please don't hesitate to get in touch!

Jon Pienkowski
Pacific NorthWest Computers
www.pnwcomputers.com
360-624-7379