Friday, April 7, 2023

Test Your Laptop Battery (Windows 10, Windows 11)

Easily test your Windows 10 or Windows 11 laptop's battery with a simple command using the built-in Microsoft Windows Powershell!

  1. Open the Windows PowerShell by right-clicking on the Start menu icon and selecting "Windows PowerShell (Admin)" from the menu that appears.
    • A pop-up window may ask for permission to make changes to your device; say yes.
  2. The blue PowerShell command window will appear. 
  3. In the window that opens up, enter:
    powercfg /batteryreport /output "C:\battery-report.html"
  4. Press Enter to run the command.
  5. PowerShell will then tell you the name of the generated battery life report HTML file and where it has been saved on your computer. 
    • It should be located at the root of your C:\ drive.
  6. You can now close the PowerShell window.
  7. Next, open File Explorer and access the C: drive. 
  8. There, you should find the battery life report saved as an HTML file called, "battery-report.html"
  9. Double-click the file to open it in your default web browser.
  10. In the report, find the Design Capacity and Full Charge Capacity of your laptop's battery.
  11. Now, using a calculator on your phone or your computer, divide the Full Charge Capacity by the Design Capacity amounts.
  12. If the result on your calculator is 0.80 or less, it may be time to replace your battery!

Epson Eco Tank Ink Fill

Epson EcoTank printers are great! The ink comes in bottles instead of cartridges, the ink doesn't dry up anywhere as easily, and the ink lasts foreeevvveeerr!! 

But what happens when you have to fill one (or more) of the ink tanks, but your printer still says you are out of ink/or your ink is still low?

Well, there happens to be a built-in feature that allows you to notify your Epson EcoTank printer that you have filled your ink! Here's how you can do it:

  1. Press the "Home" button on the Epson printer's main display panel.
  2. Using the arrow pad, "<-- OK -->" (Left, Right, Up, and Down arrows with an OK selection key), you want to scroll until you get to the "Settings" option.
  3. In "Settings", you want to select "Maintenance" which is typically the first tab/page.
  4. In the "Maintenance" menu, you want to scroll to and select "Fill Ink"
  5. Next, you will be asked to select which ink tanks you have recently filled, and then you will be asked to confirm that they were in fact filled.
  6. That's it!

Your ink level/status on the Printer as well as the Status Monitor software installed on your computer (if you have it installed) should now show your Printer's ink as being full! 

That's it!


Wednesday, April 5, 2023

Xfinity, Comcast, Comcast Business Modem Port Forwarding

 Xfinity, Comcast & Comcast Business 
Modem Port Forwarding

  1. Login to your Xfinity/Comcast Modem by entering one of the two following IP addresses into a browser address bar:
    1. 10.0.0.1 for residential customers.
    2. 10.1.10.1 for Comcast Business customers.

  2. The default logins for most Comcast/Xfinity modems are:
    1. Username: cusadmin Password: highspeed
    2. Username: admin Password: password

  3. After you log in, if you are asked to change the default password, do so! That way no random people can try to gain access to your modem if they gain access to your wifi/network. Use a safe/secure password and make a note of that information for future use.

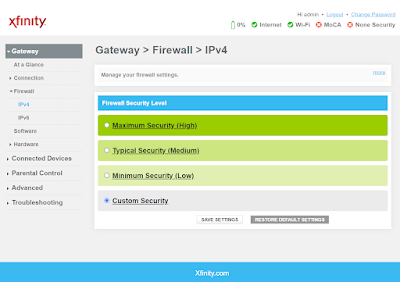
  4. First off, you want to configure the Firewall in your modem to either be set to Custom or if you can, turn it off completely if possible.

  5. After turning off the Firewall, go to "Connected Devices".

  6. Reserve the IP address (set a static IP) for the device that you are port forwarding to.

  7. Click on the "Advanced" tab, and you can then set up any/all port forwarding rules as needed to your statically assigned device!
Xfinity/Residential Modem Firewall:

Comcast Business Modem Firewall:

  • To make sure you have in fact opened the needed ports successfully, you first need to figure out your public IP address. You can visit www.whatismyip.com and get your Public IP address.
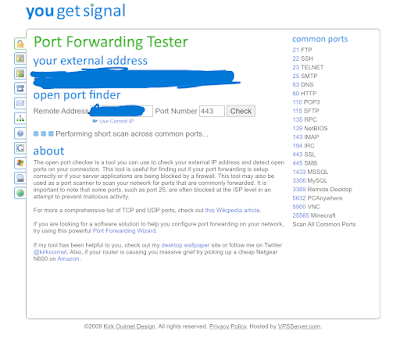
  • Next, visit www.yougetsignal.com's Open Port testing site and make sure the ports you have opened/forwarded are indeed working!